
Learning to tie knots is a fundamental skill, essential for both everyday use and thrilling sports. It’s especially important for sailing, where mastering knots like the figure-of-eight, bowline, reef knot, and clove hitch is very helpful. These knots are not only good for sailing but also incredibly useful for other sports and various everyday tasks. Follow our videos to teach yourself these essential techniques.
Figure of 8 knot
Tying a figure of eight knot is a reliable knot used in various applications, especially in sailing and rock climbing. The figure of eight knot is known for its security and is often used to prevent ropes from slipping through a cleat or to create a secure stopper knot that is simple to untie even after being under load, so no matter how much force you put on it, it can still be easily undone.
Follow this step-by-step guide to help you learn how to tie a figure of eight knot:
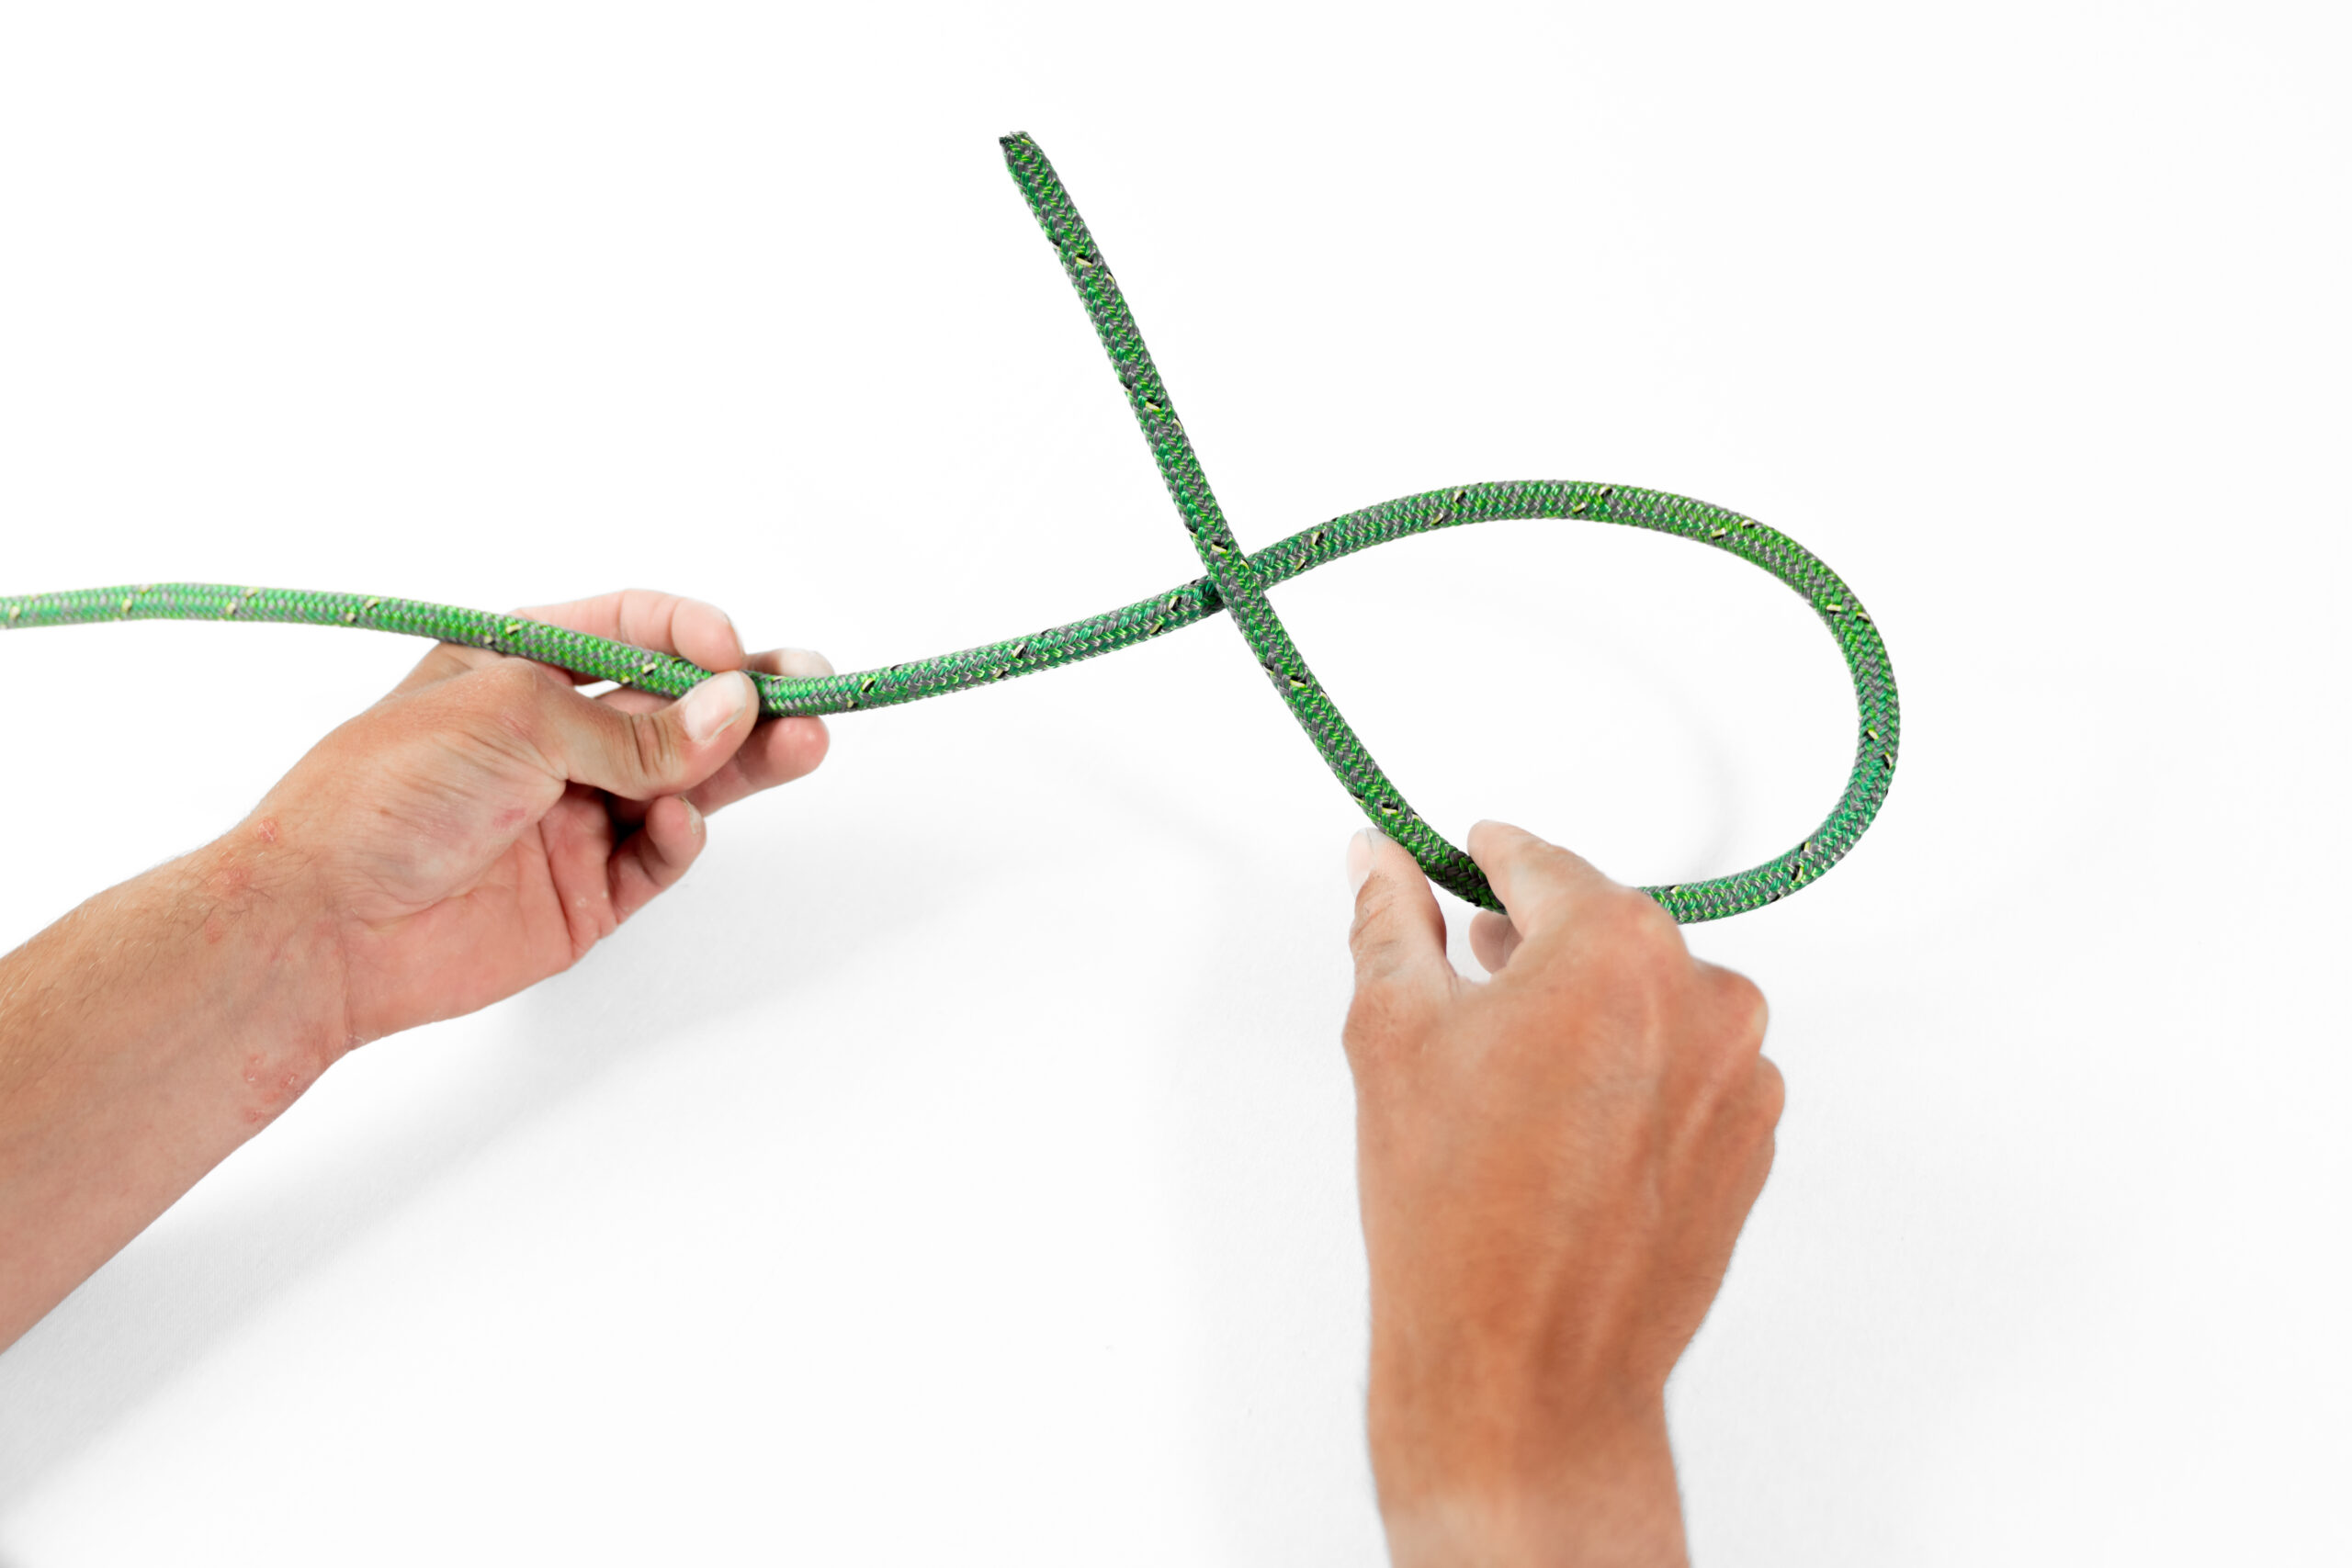
Create a Loop
Hold the rope in your hand and create a loop by crossing the working end (the end of the rope) over the standing part (the long part of the rope).

Wrap and Cross
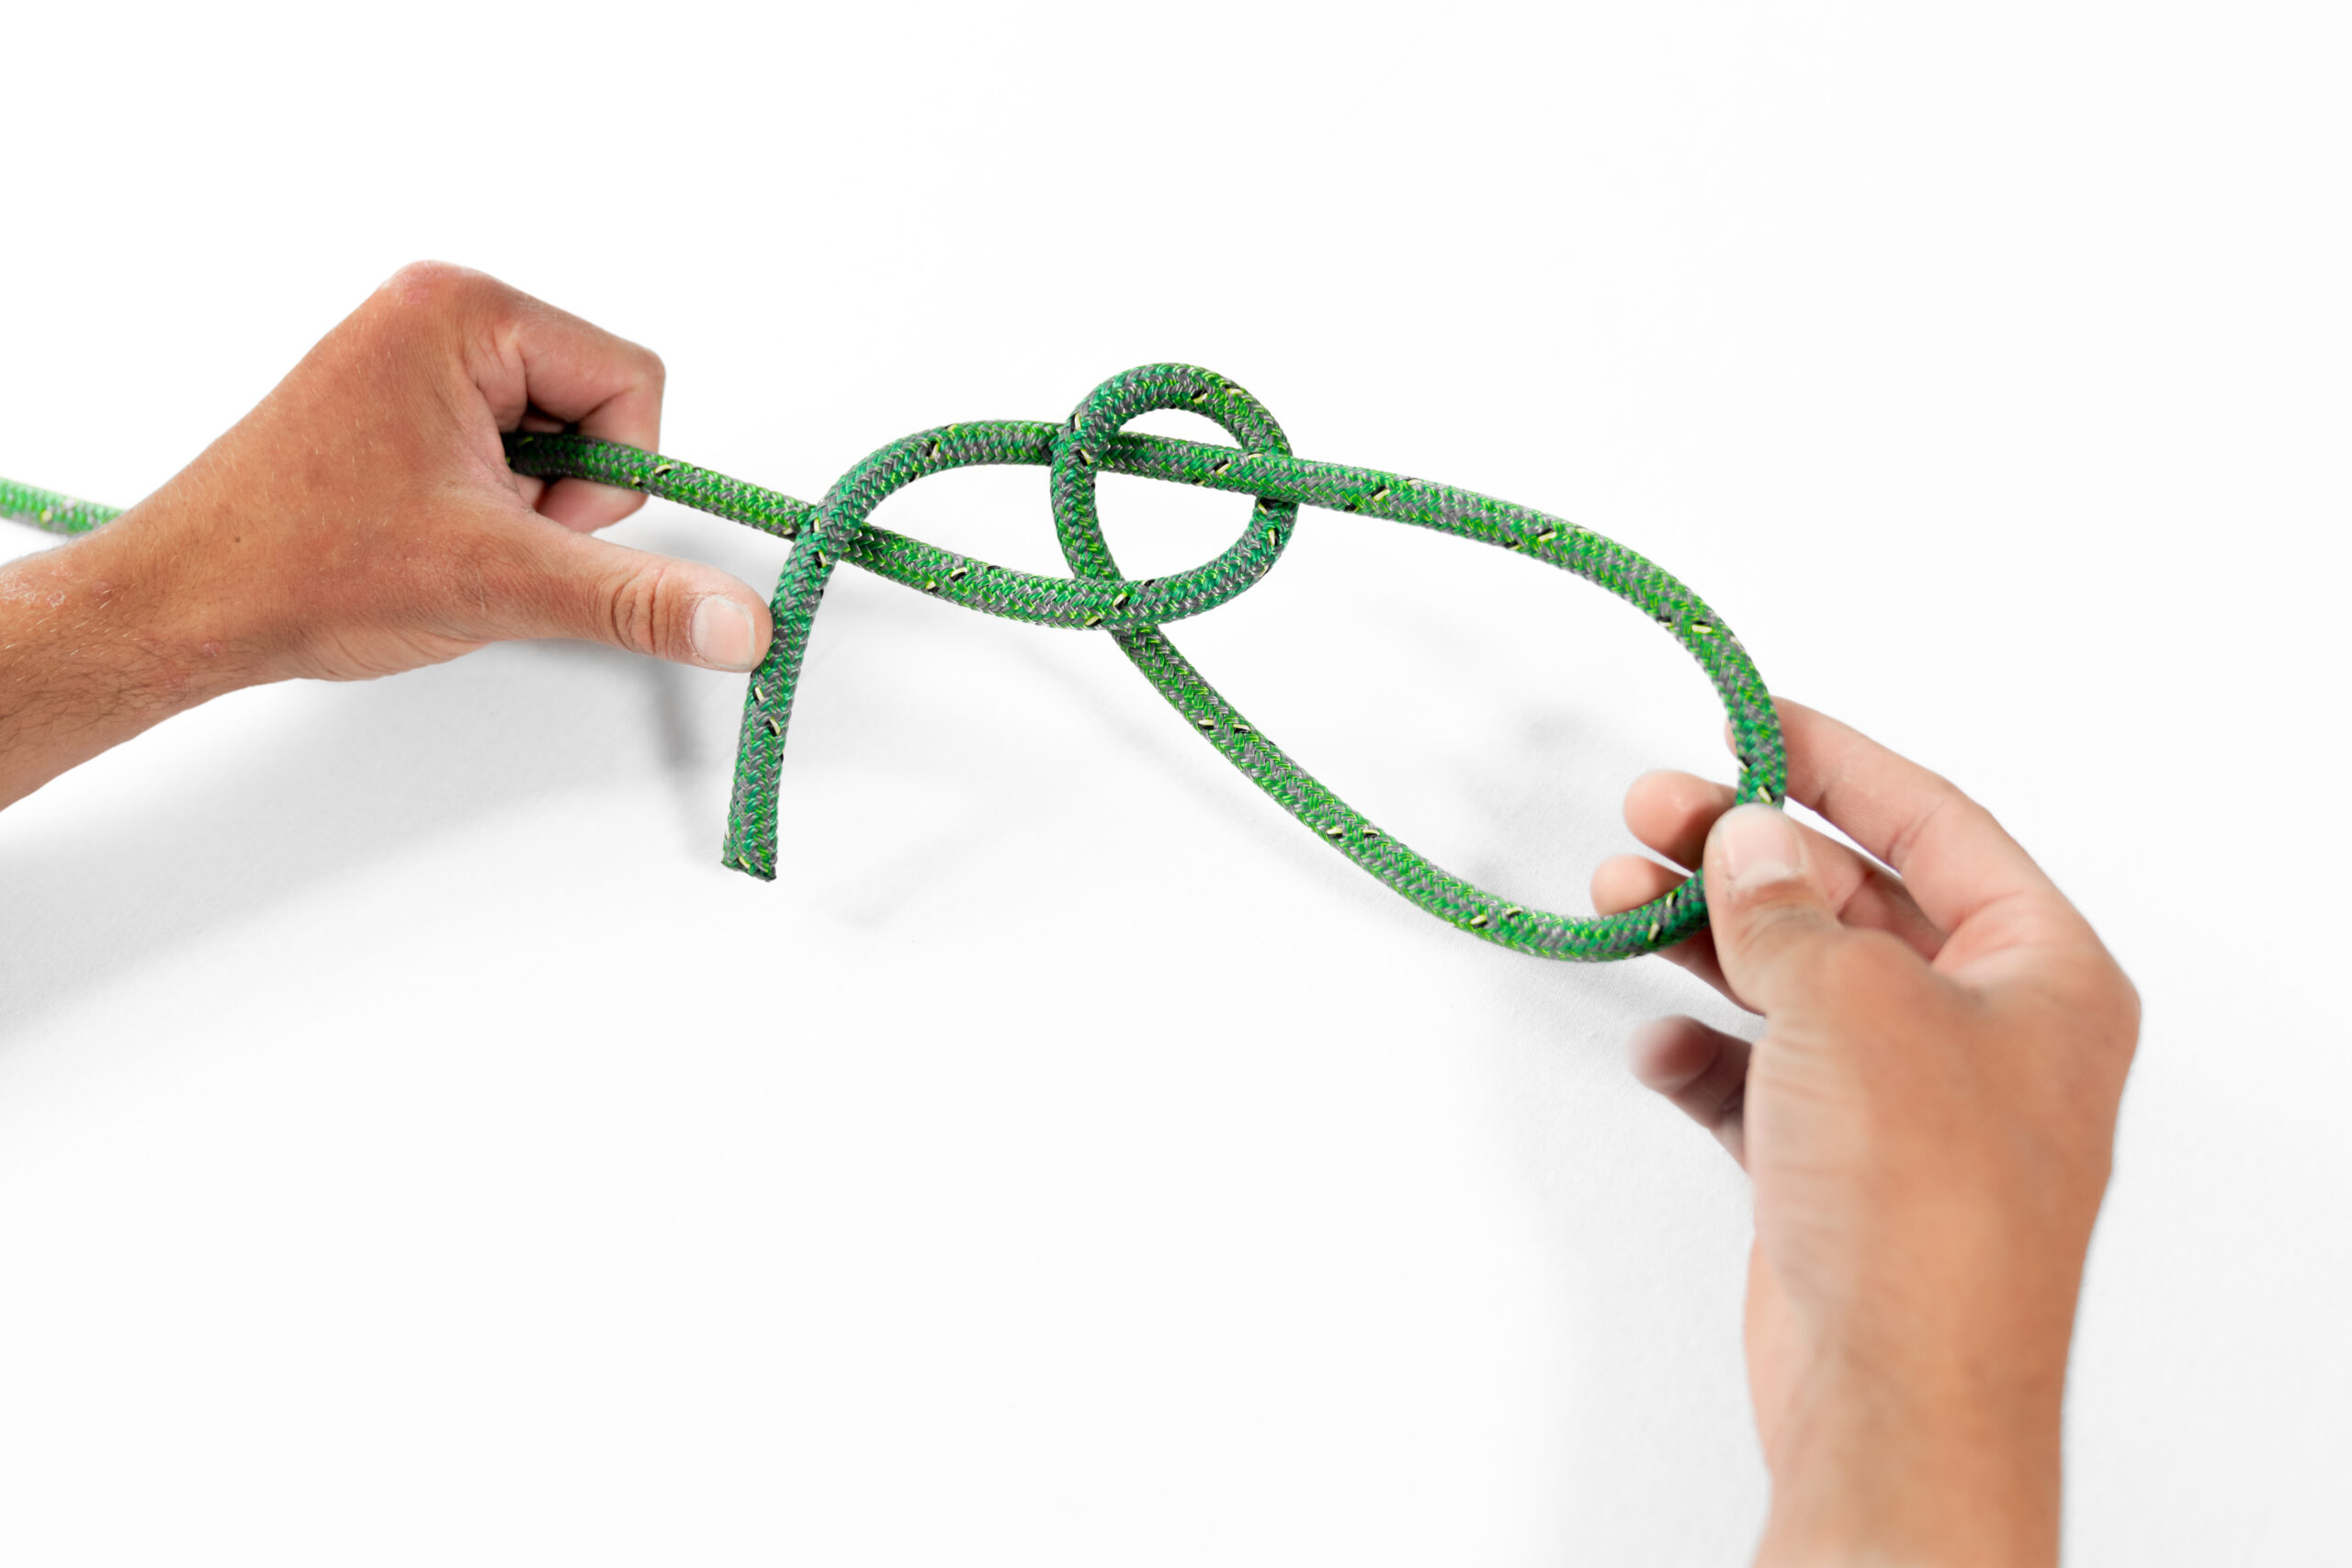
Take the working end behind the standing part.
Bring the working end back over the front of the loop, crossing over the standing part.
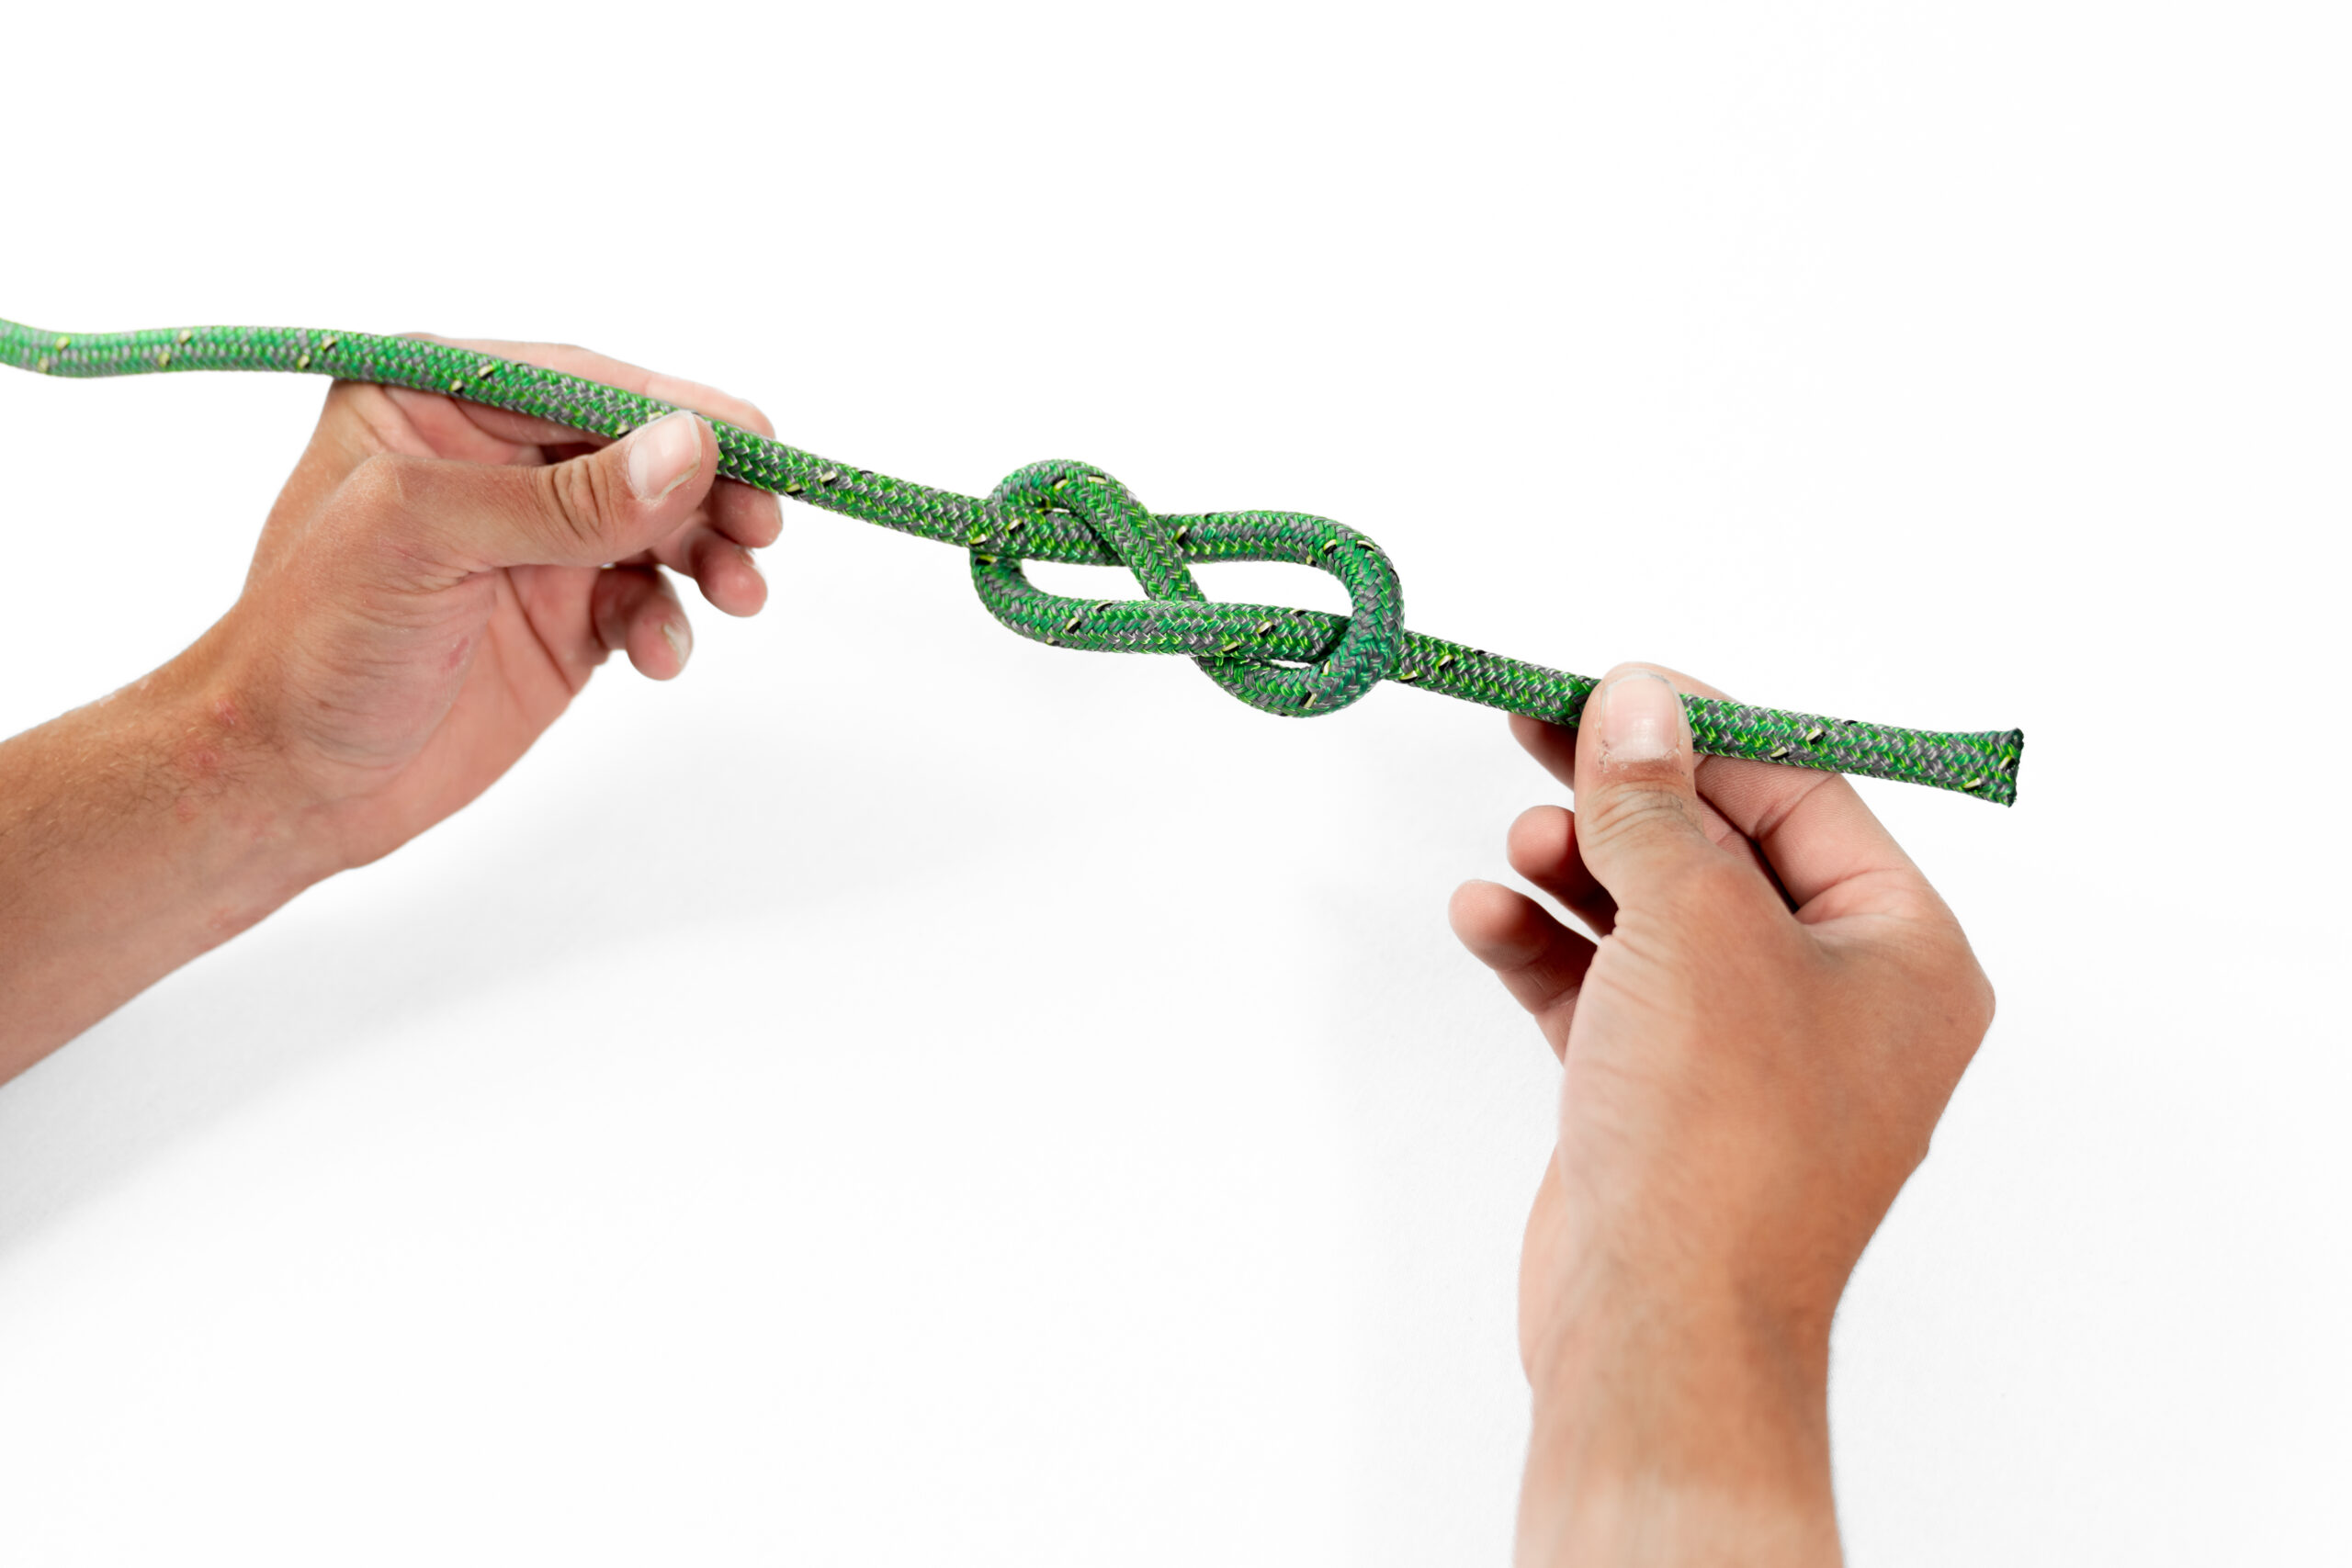
Thread through
Pass the working end through the loop from the front to the back.
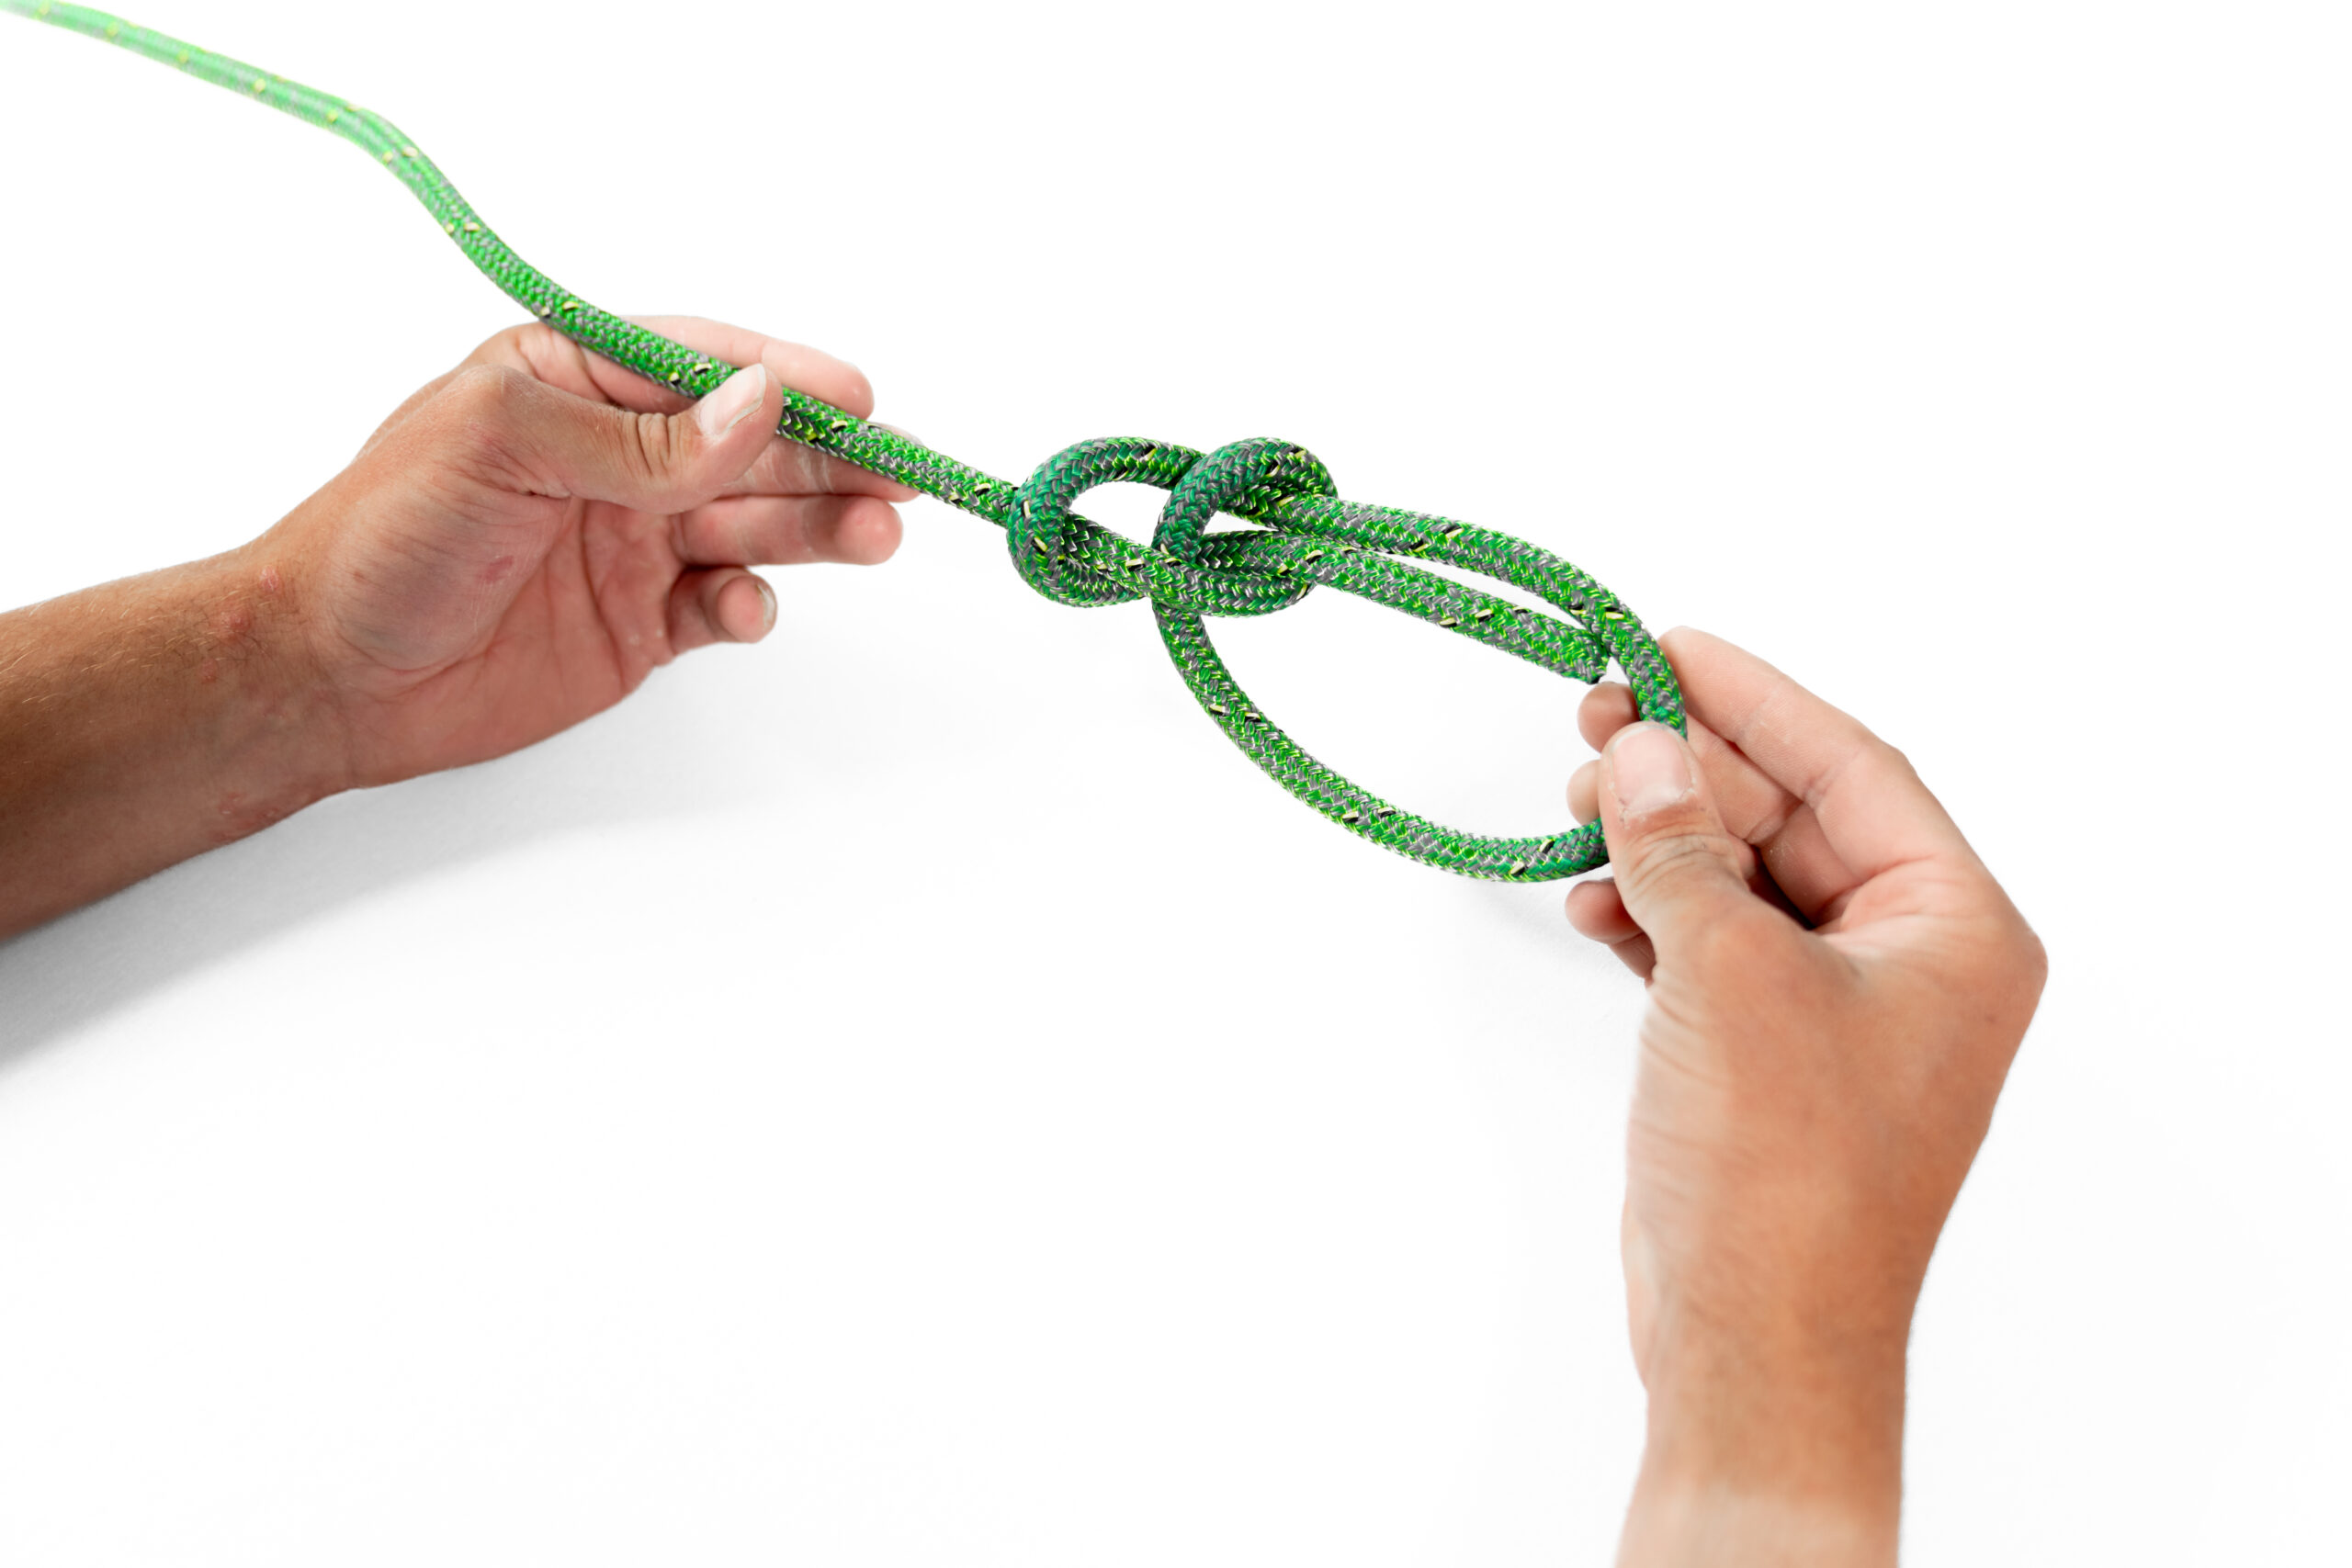
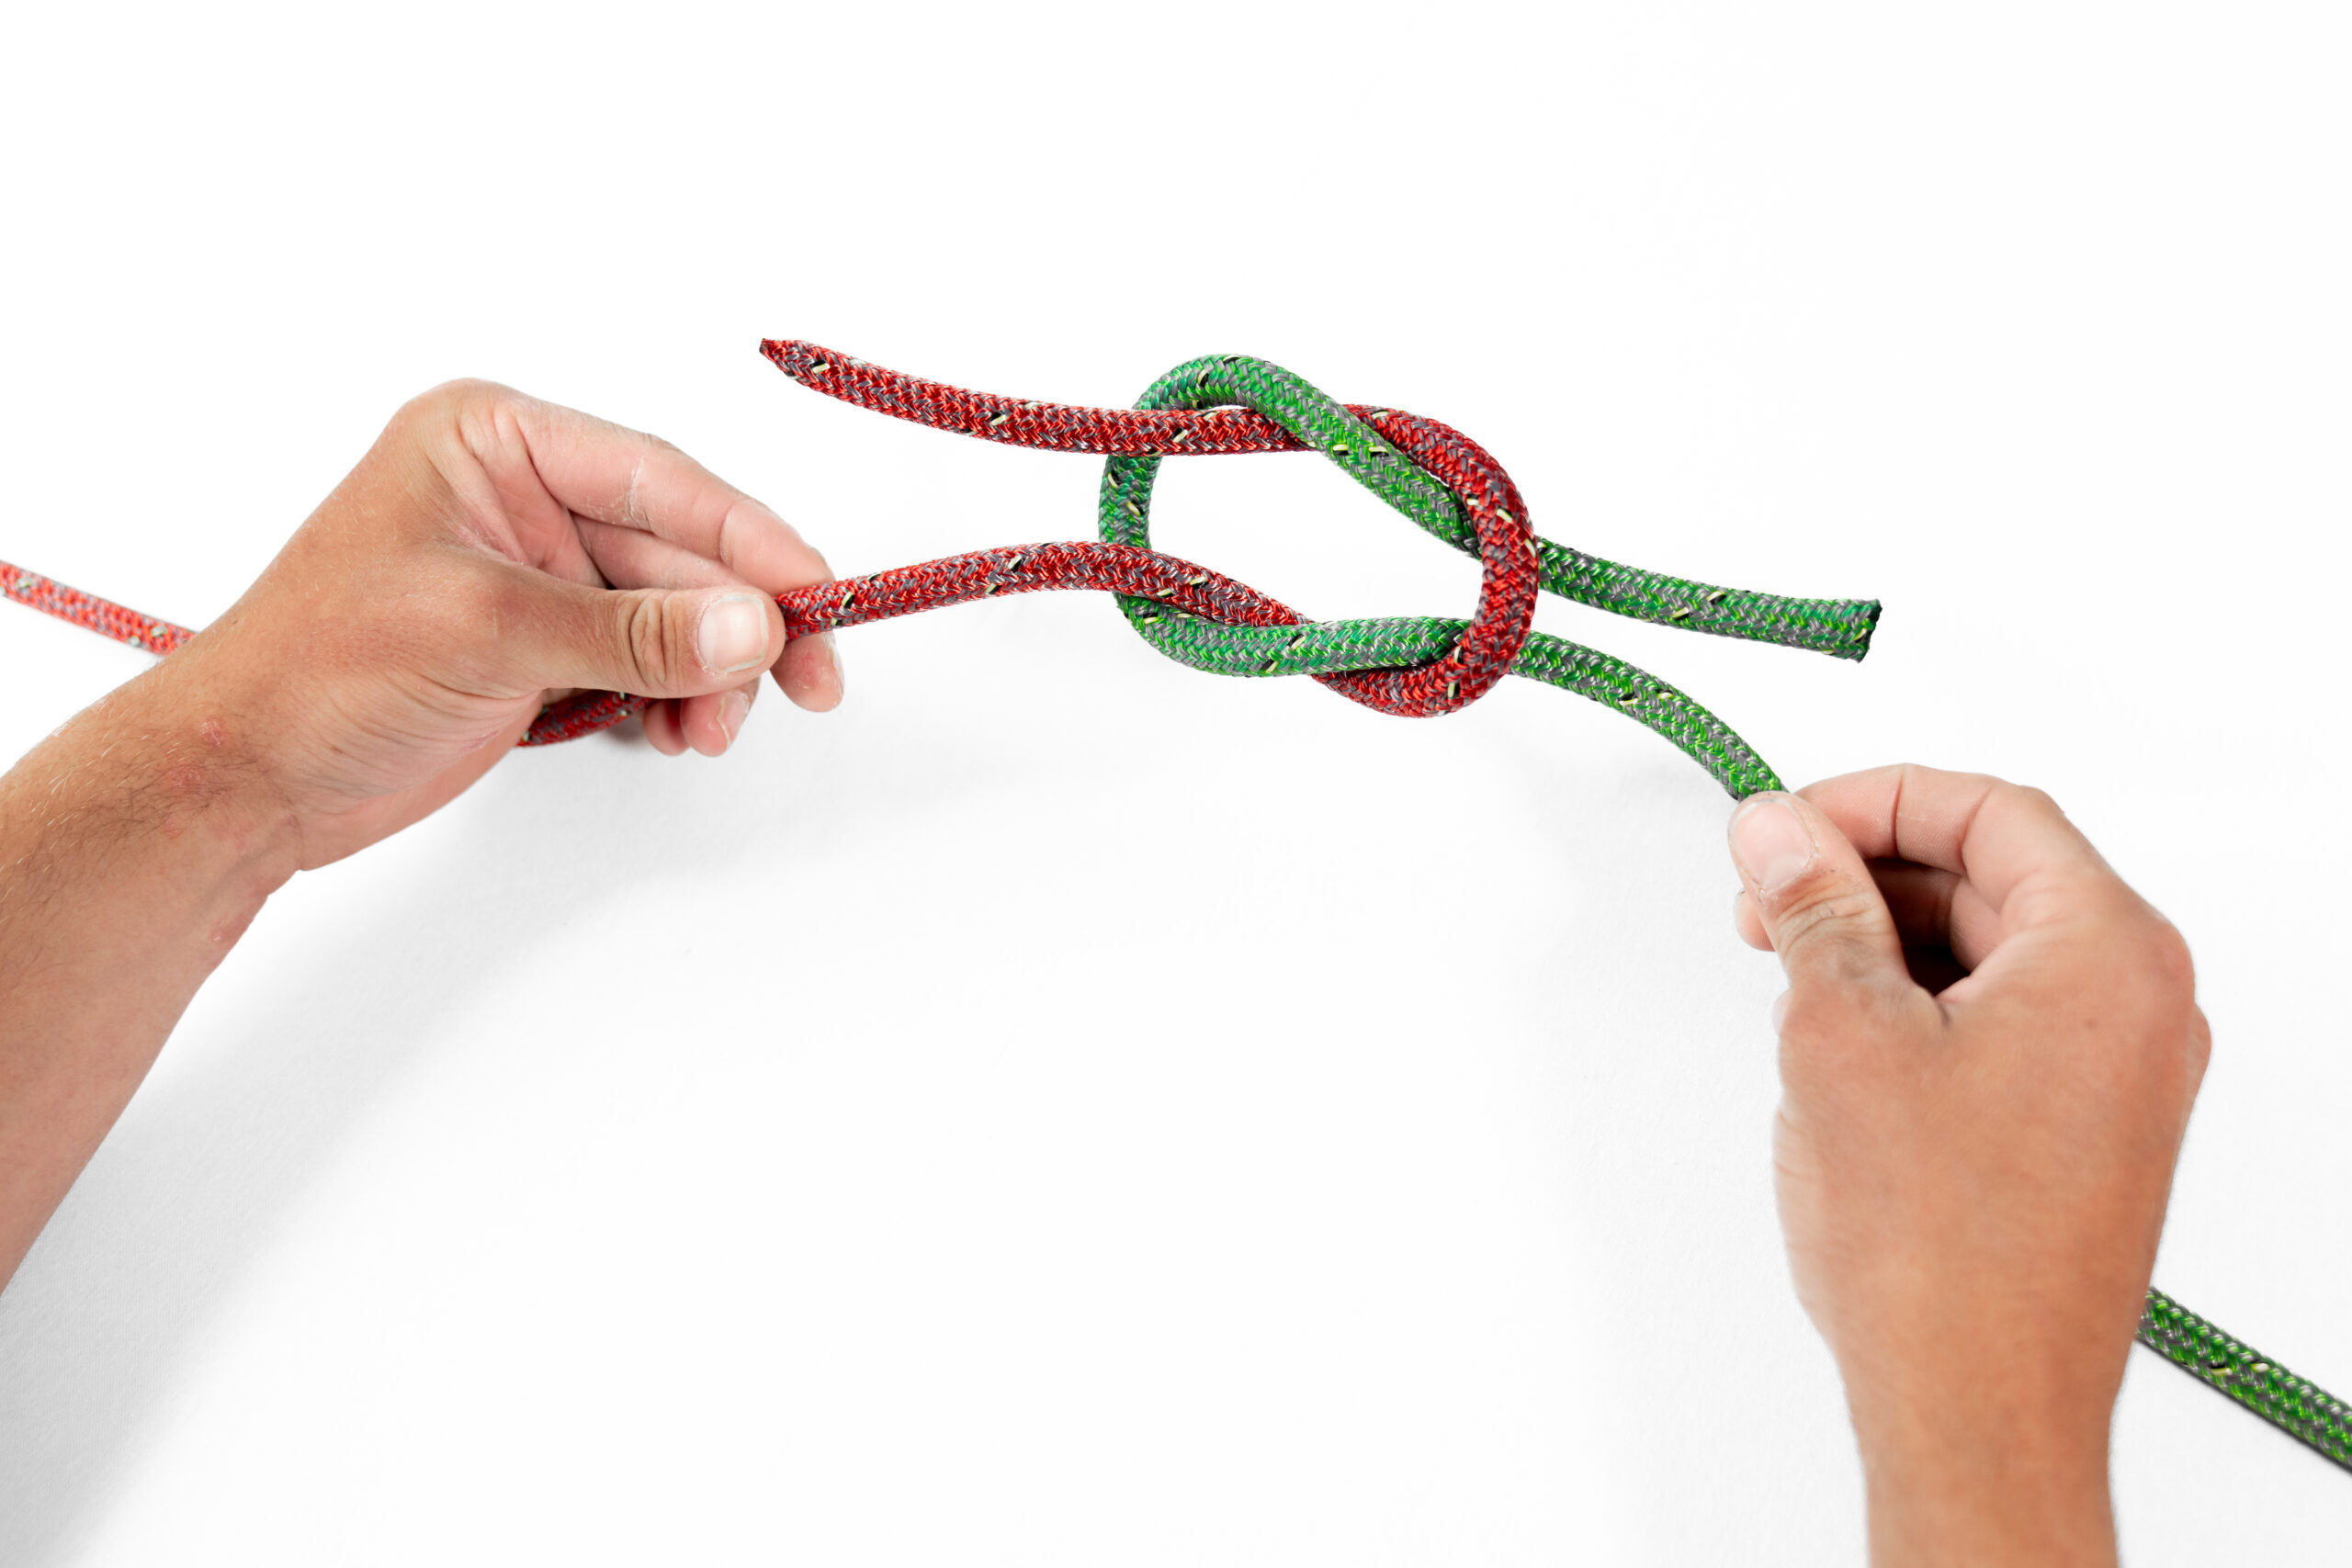
Tighten the knot by pulling both the standing part and the working end simultaneously. Ensure the wraps are snug and properly aligned.
Check the Knot
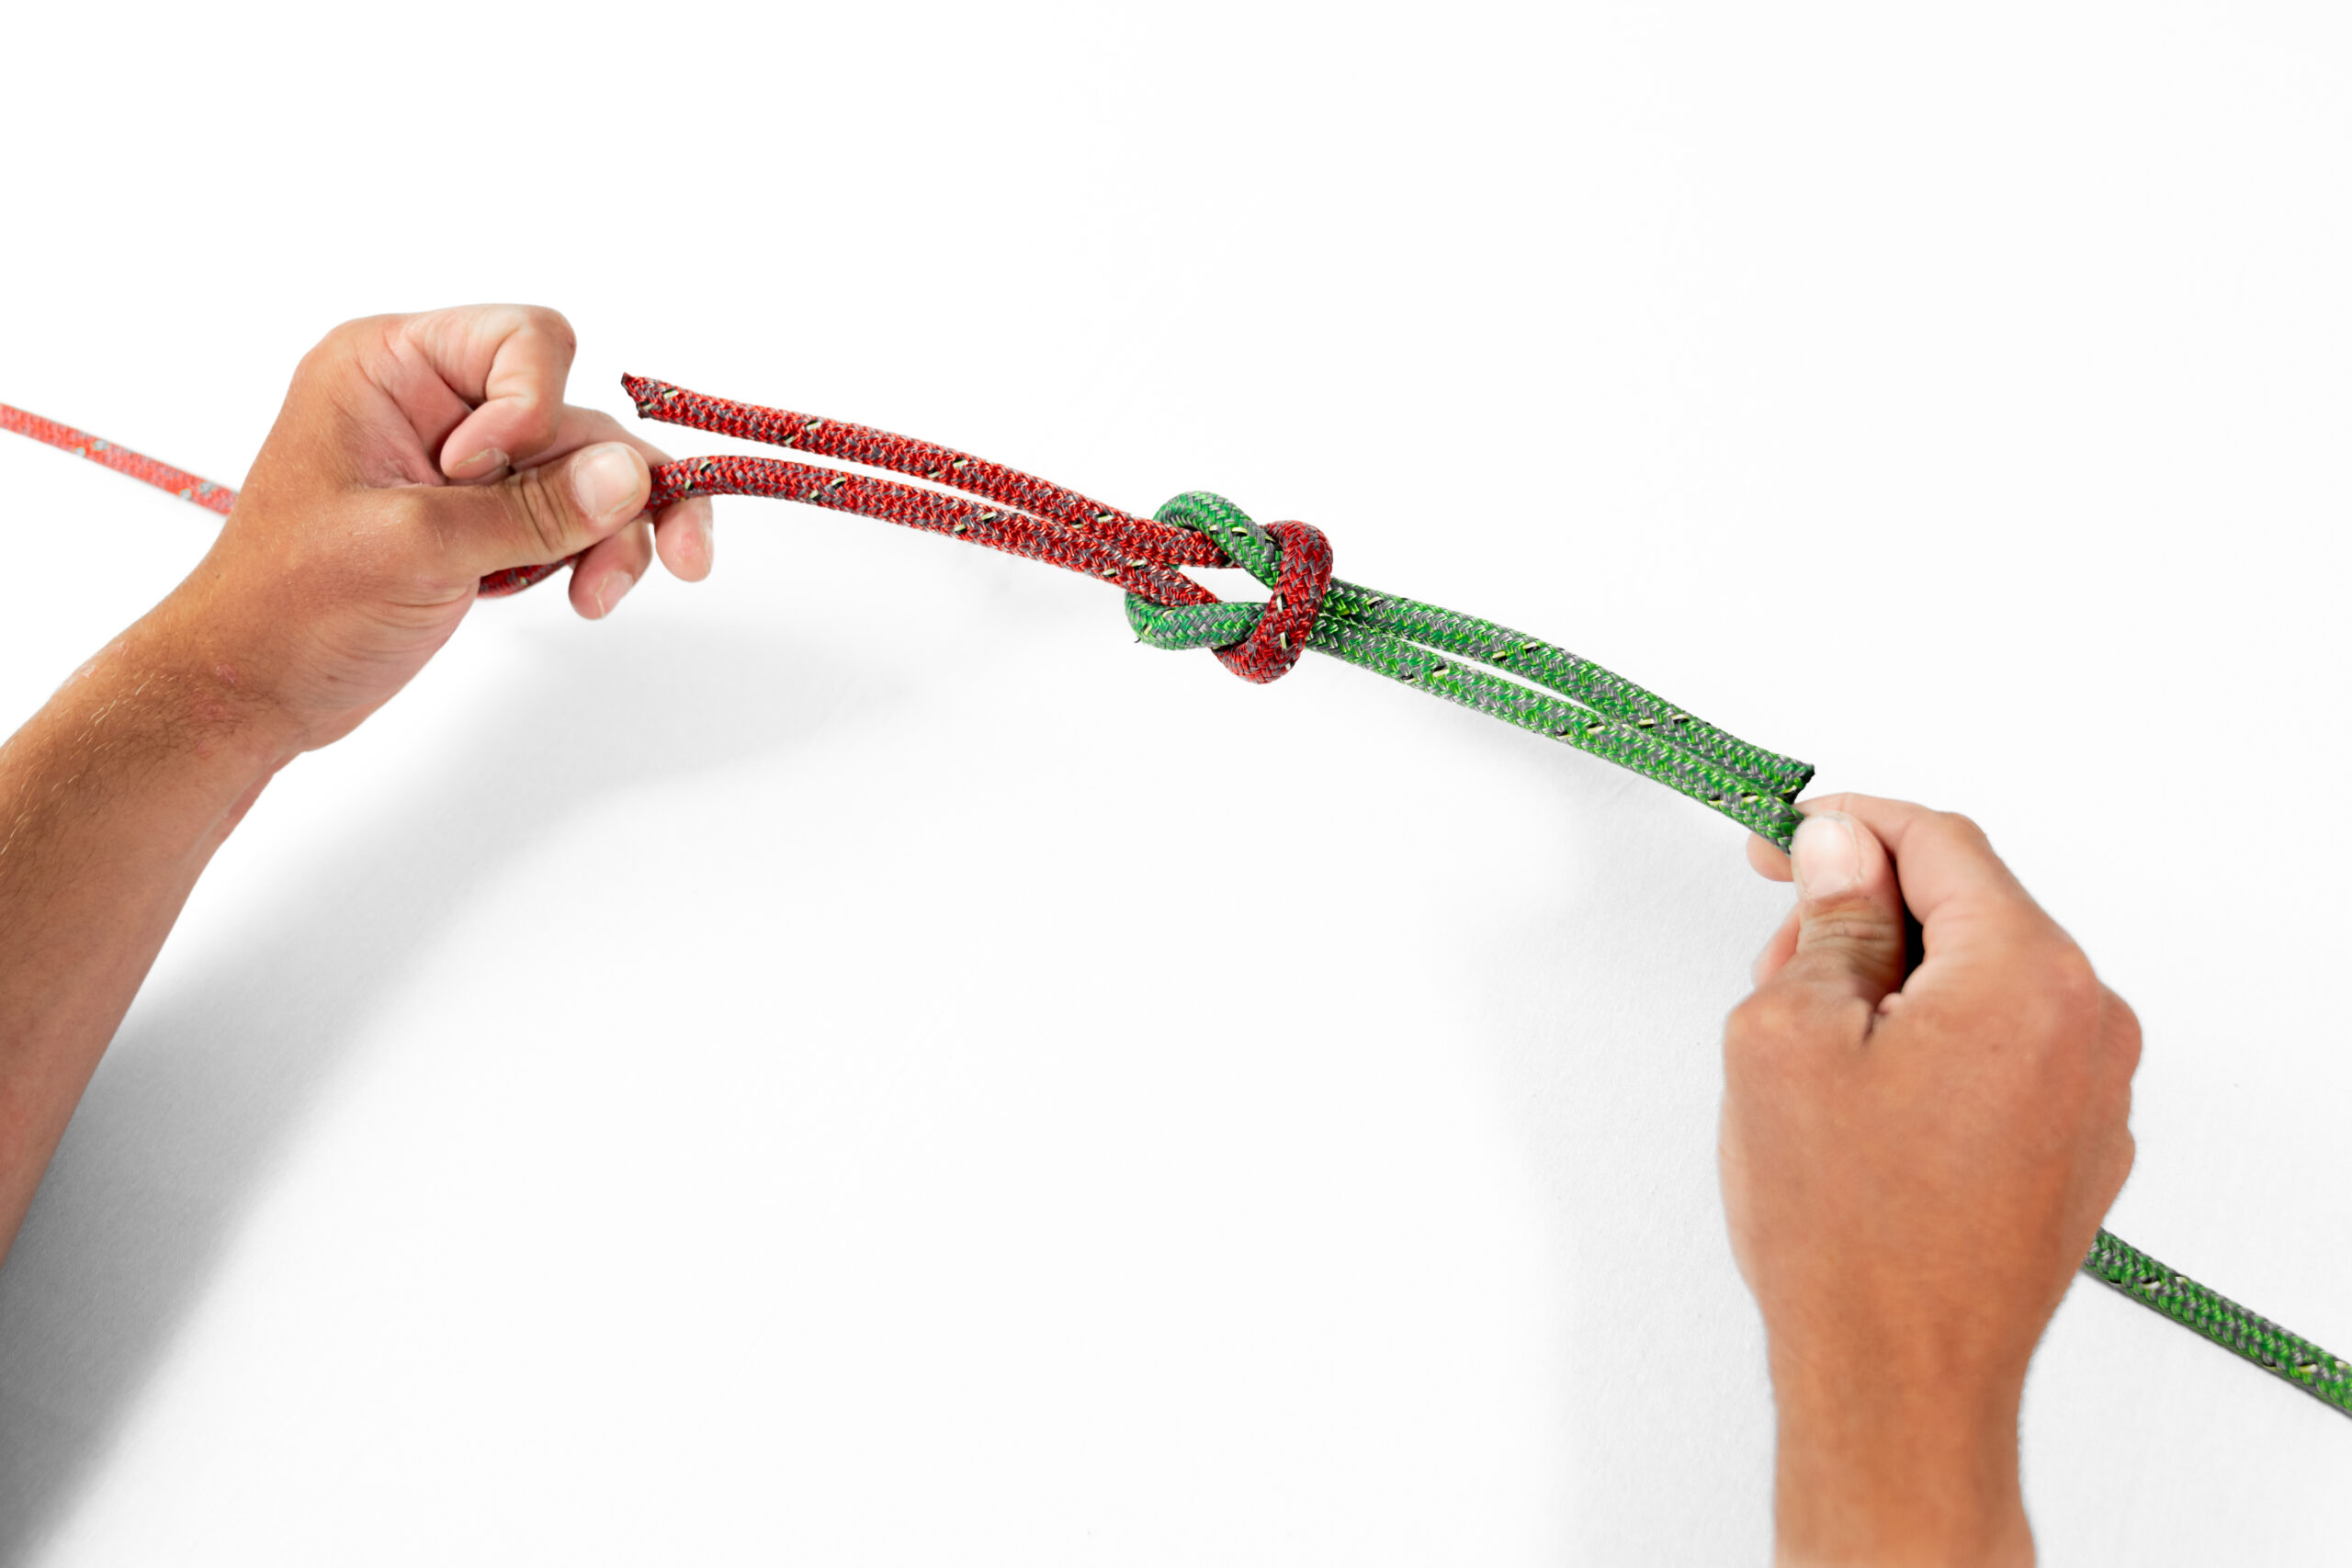
Verify that the knot resembles a figure-eight shape. The two loops of the knot should be symmetrical and properly formed. Remember to leave an adequate tail on the working end for safety.
Undo:
Pull either loop within the knot to undo it.
Bowline
Tying a bowline knot is a versatile knot used in various activities such as sailing, climbing, and camping. The bowline is known for creating a secure, non-slip loop that is simple to untie even after being under load, so no matter how much force you put on it, it can still be easily undone. It is commonly used for:
- Mooring a boat alongside a pontoon by creating a loop at the end of a rope that sits under the cleat, thereby leaving enough space on the cleat for either a second line or even a third; tying three separate ropes would not work on just the two cleat protrusions. This allows the crew on board to throw the coiled rope ashore to use the cleat by taking two turns to prevent the boat hitting the pier or to loosen the turns until another line is correctly cleated.
- Alternatively, the crew member creates a bowline ready to throw whilst the other end is already passed through the eye and has a few turns on the cleat. The person ashore then drops the pre-made loop onto the ashore cleat and the crew tightens the line on the yacht.
- Bowline knots are also used for attaching the halyard to a bosun’s chair before pulling a crew member up the mast. NB it is essential that a second halyard should be used as a safety line.
- Finally, Bowlines are also used for various rescue applications and towing a boat because the knot will be easily undone.
Use this saying to help remember how to tie a bowline: “the rabbit goes down the hole, around the tree and back up the hole”.
Here’s a step-by-step guide on how to tie a bowline (mostly pronounced as BOWLIN) knot:
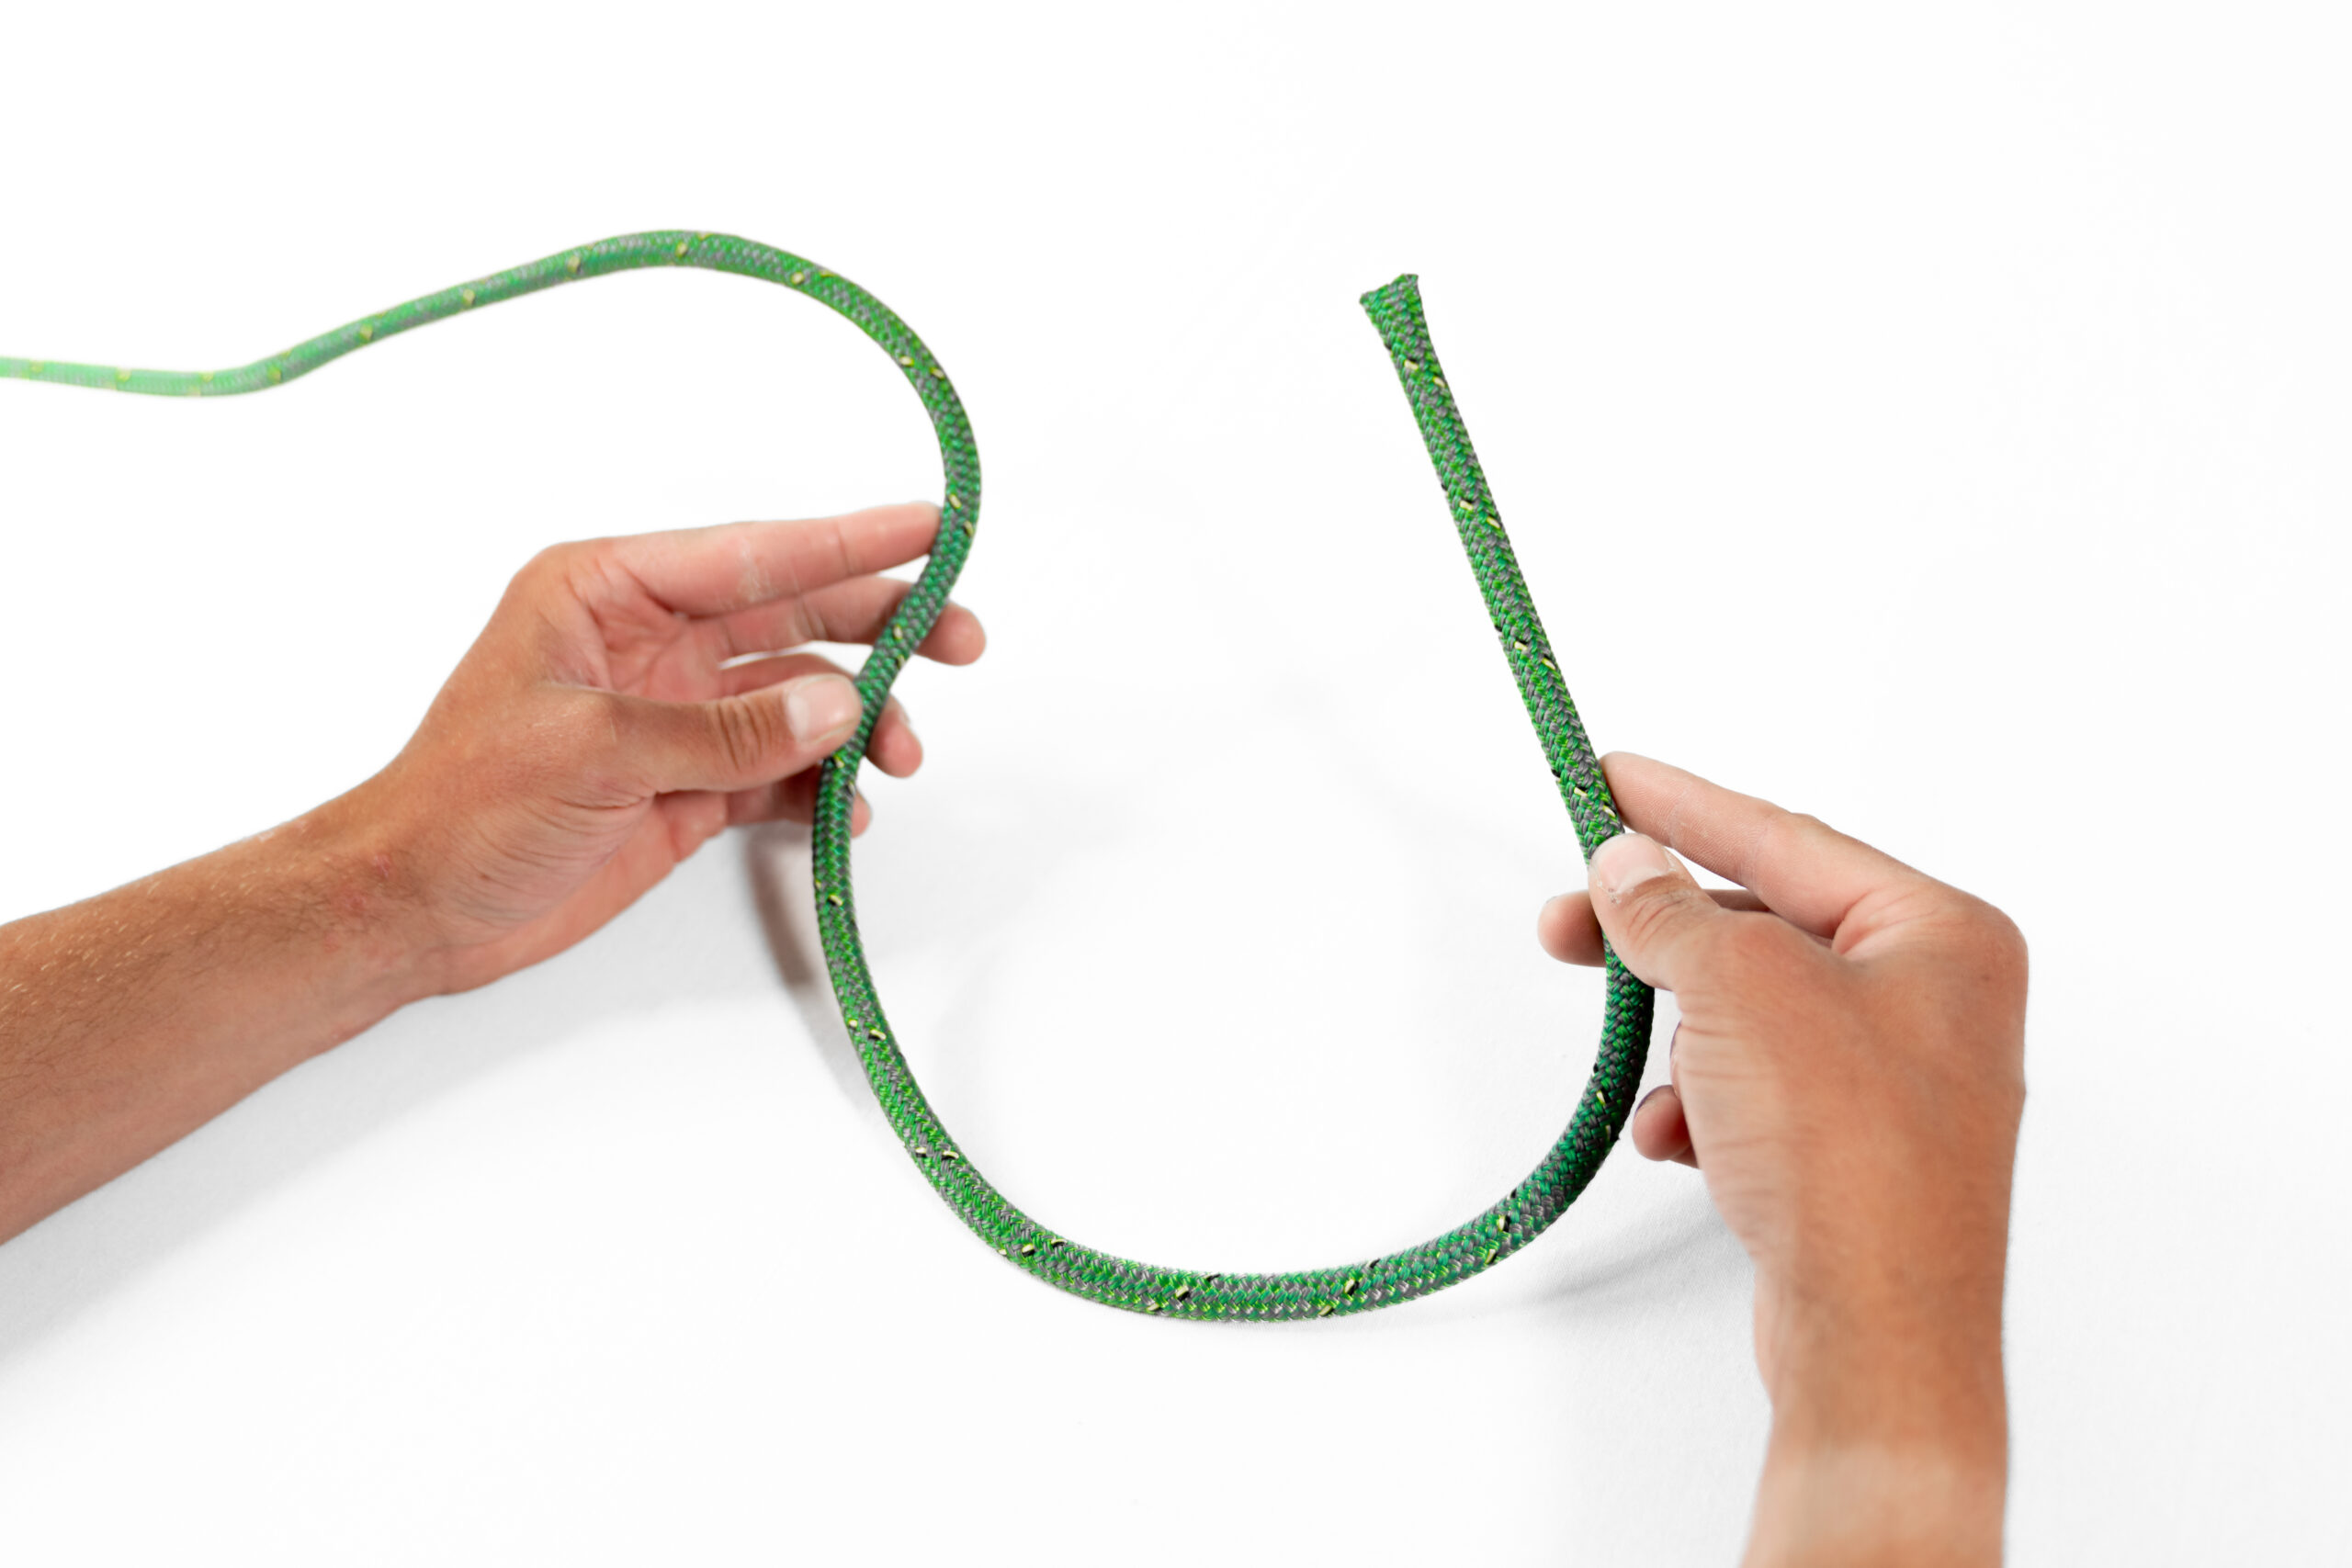
Start with an Overhand Loop
Begin by forming an overhand loop near the end of the rope. The end you’re working with is the “working end” and the rest of the rope is the “standing part”.
Pass the Working End through the Loop
Take the working end and pass it through the loop from underneath, going down.
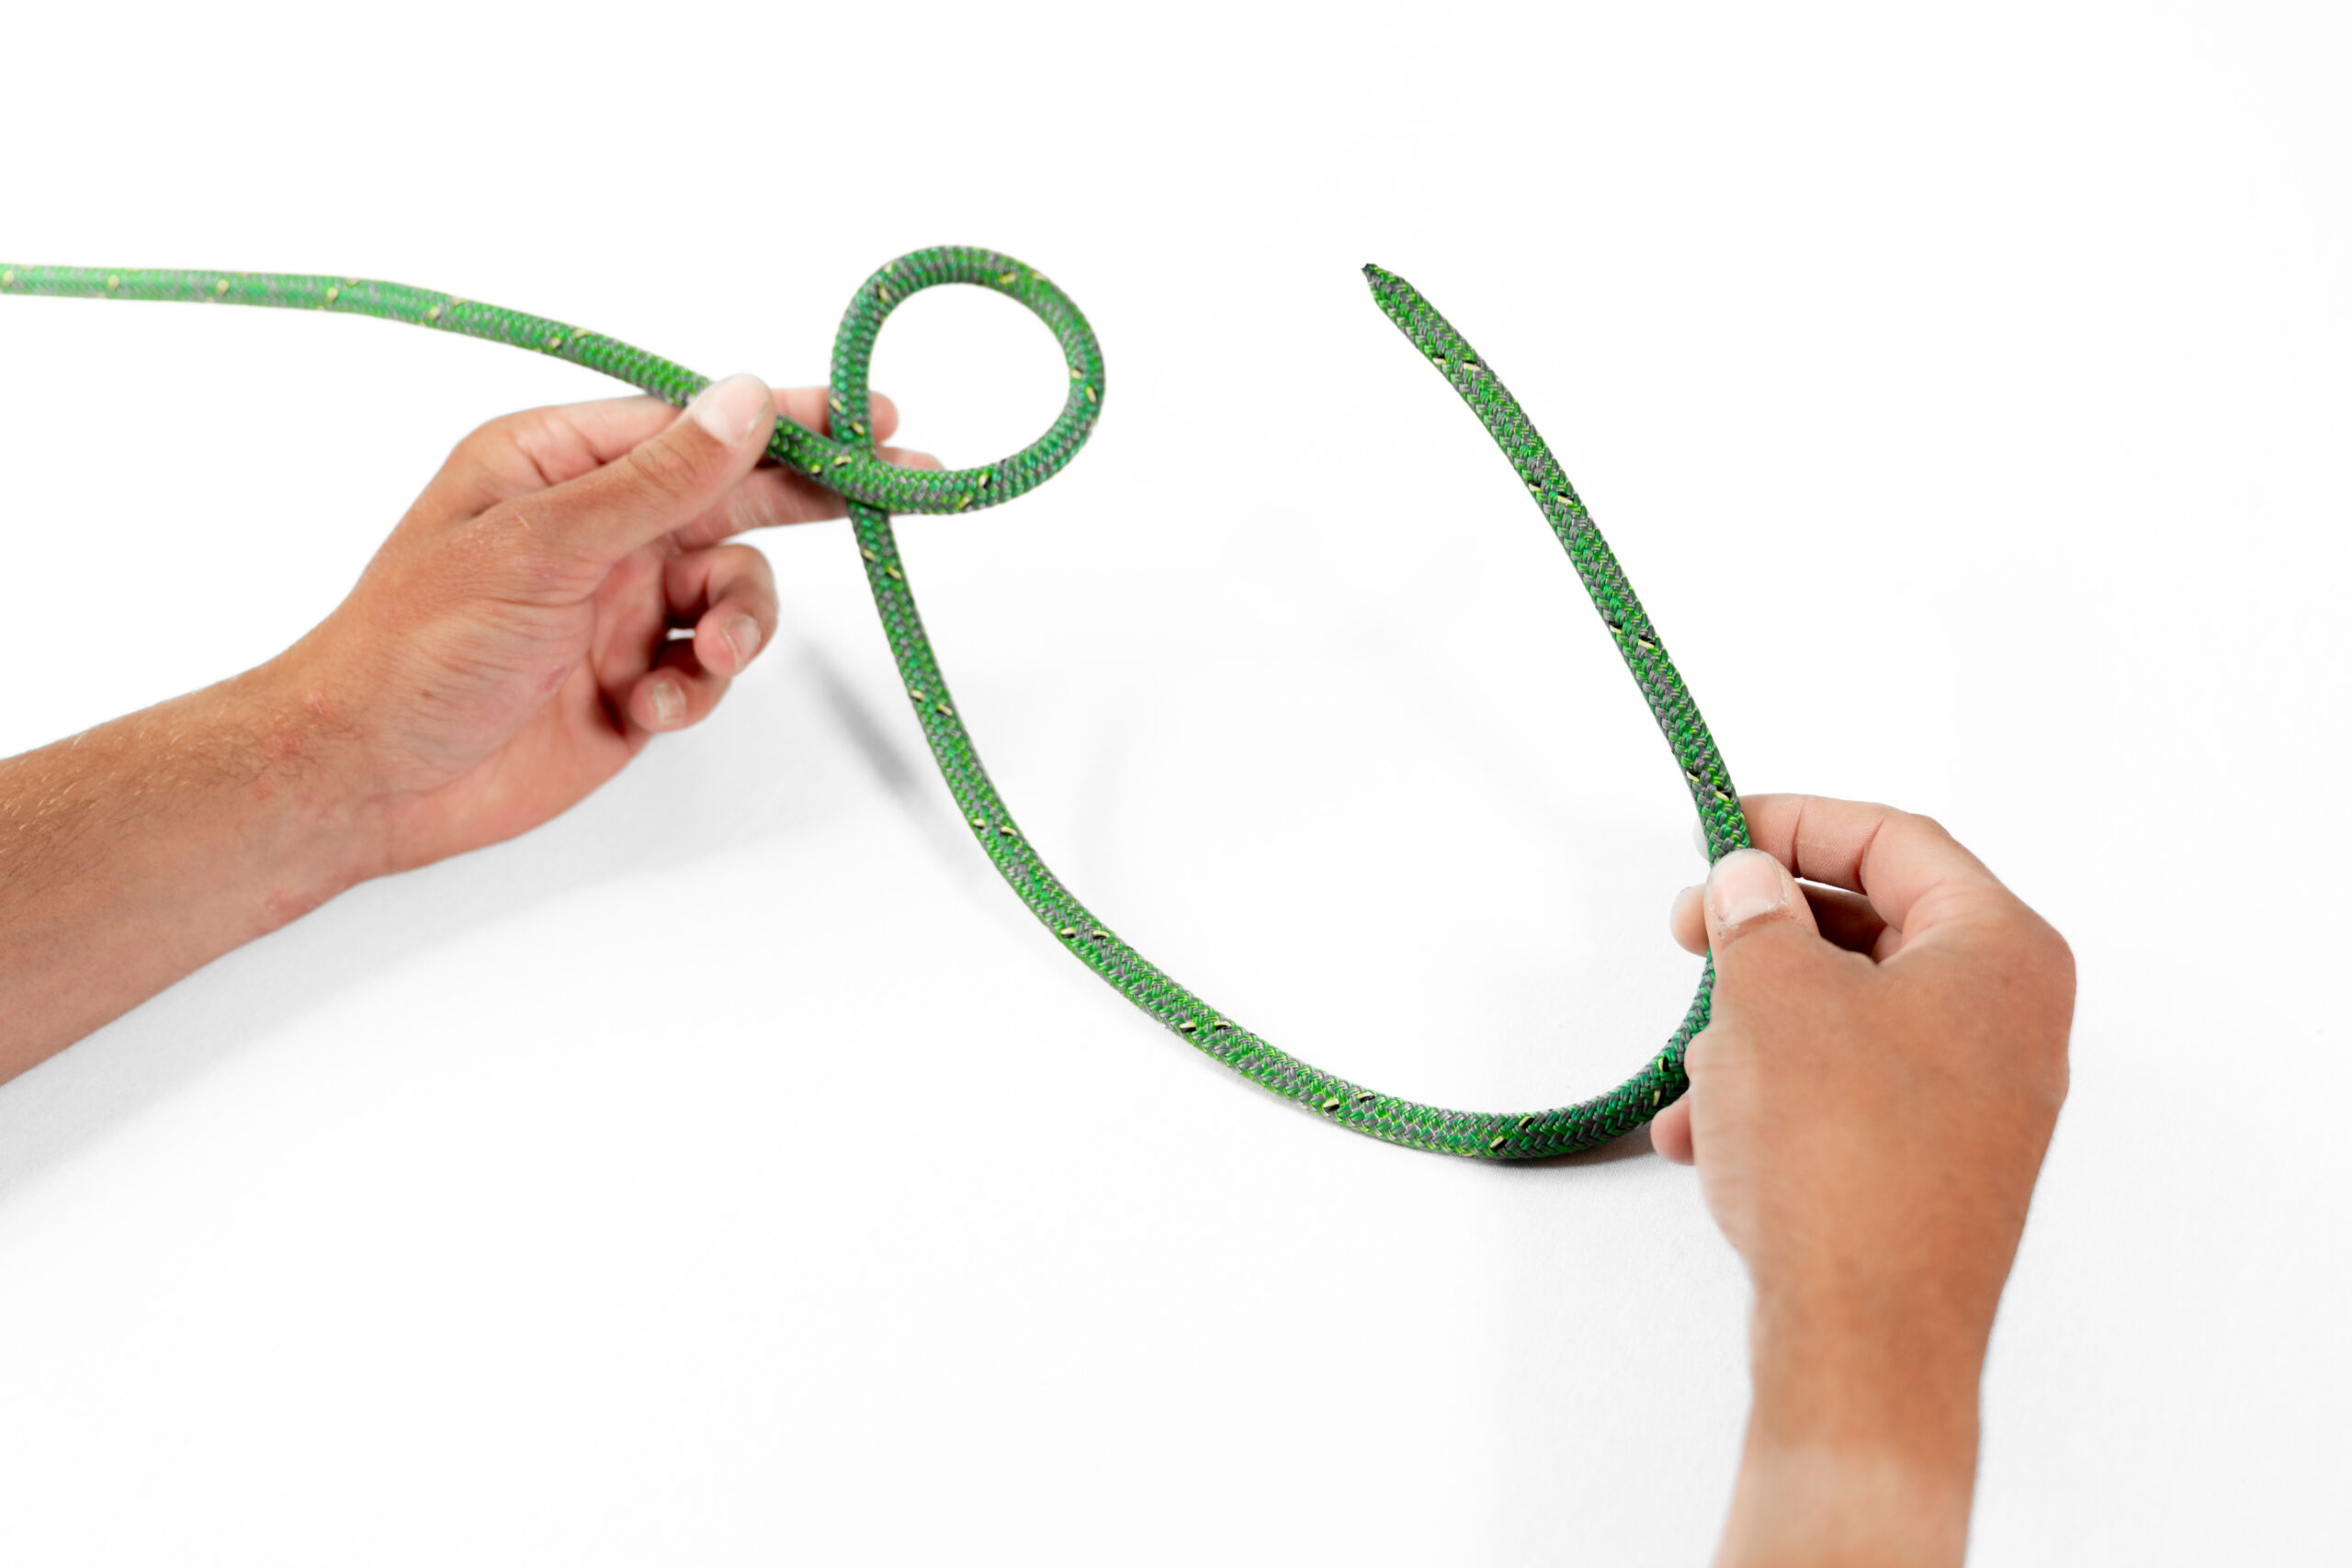
Wrap Around the Standing Part
Wrap the working end around the standing part of the rope, going over the top.

Pass Back Through
Bring the working end back down and pass it through the loop from the bottom, going up.

Tighten the Knot
Hold the standing part of the rope with one hand and pull the working end with the other to tighten the knot. Ensure the knot is snug but not overly tight.
Check the Bowline
Confirm that the knot forms a distinctive loop with the working end emerging from underneath the standing part. The knot should resemble a small loop with the working end as its tail.
Undo:
Take the bowline in hand and pull back the tight small loop inside the knot. This will ease the knot easily, even after heavy use.
Reef knot
A reef knot, also known as a square knot, is commonly used for tying two ends of a rope ropes of equal diameter together. It’s a symmetrical, simple and quick. The reef knot is used when reefing a sail to ensure the unused portion snugly tied to the boom when lines of similar size are permanently attached on both sides of the mainsail. Avoid using the reef knot when the ropes are of different sizes, as it can be prone to slipping under uneven loads. To help remember how to tie a reef knot, try to memorise the following, left over right and under, right over left and under. To differentiate from a granny knot, you can see the reef knot has two ropes parallel under the loop at one end and the opposite end has two parallel lines above the loop;
Here’s how to tie a reef knot:

With Two Ends
Take two ends of the rope and lay them parallel to each other.
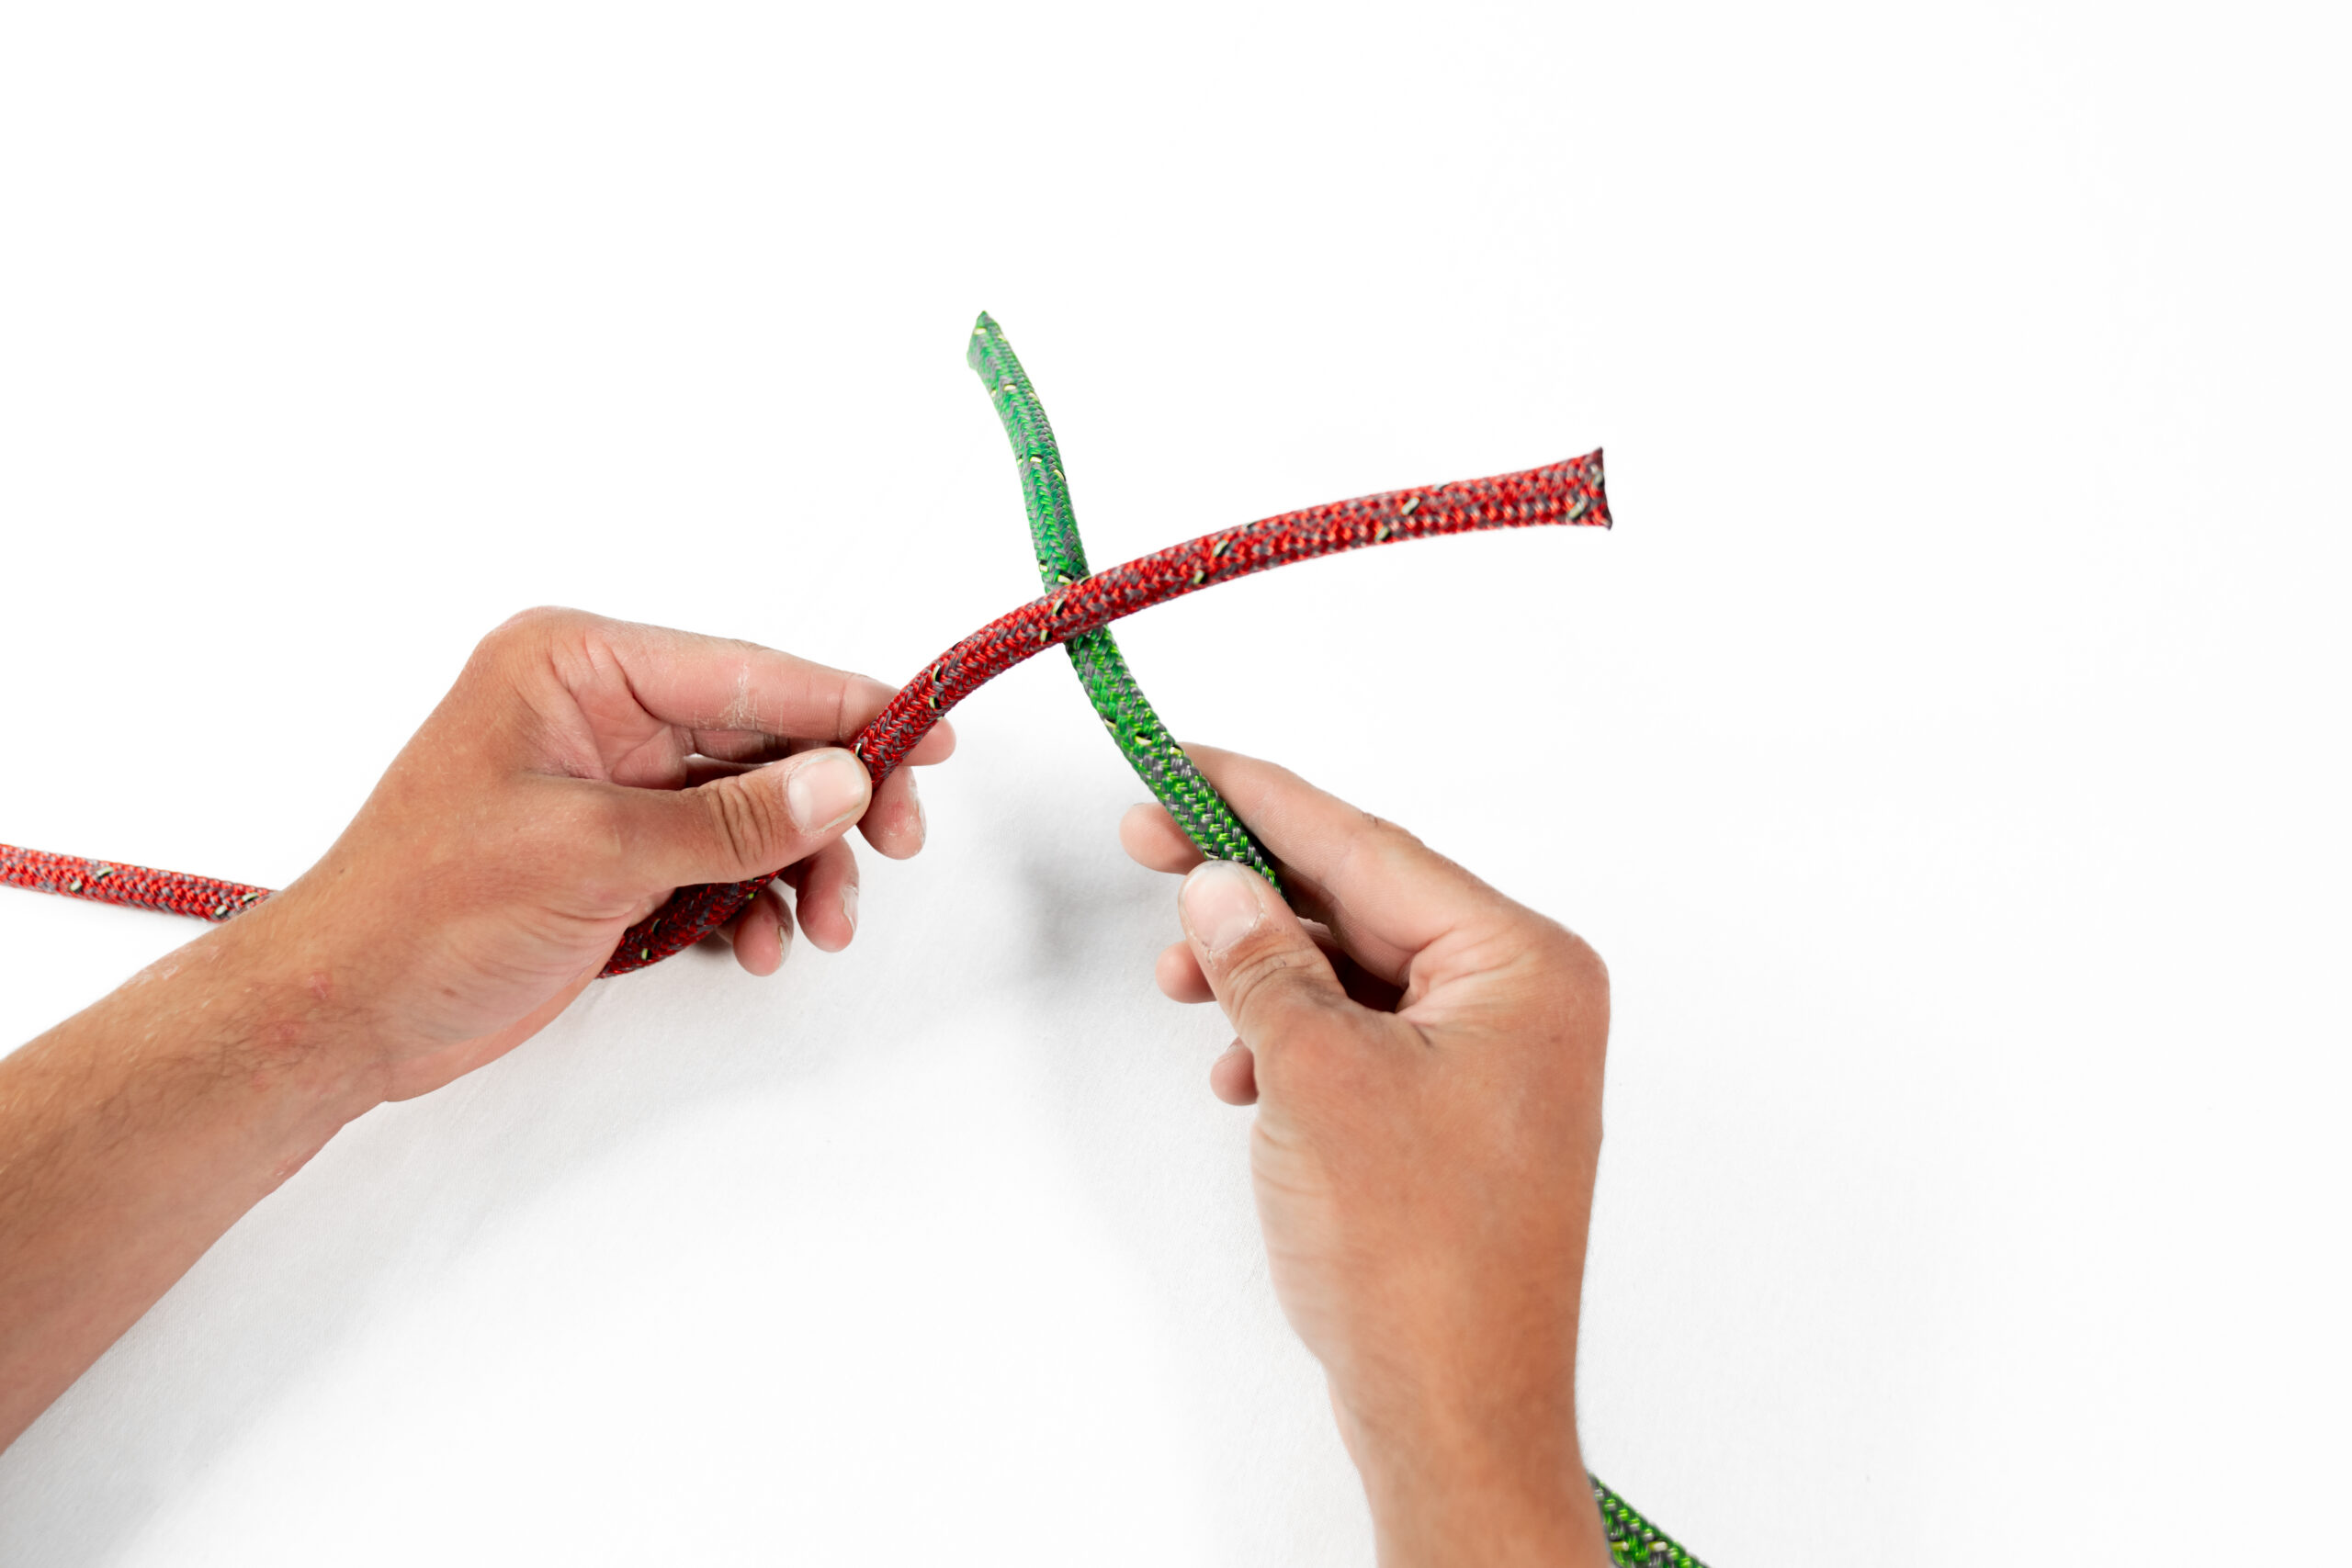
left over right
Cross the right end of the rope over the left end, forming an X.

left Under right
Take the right end and tuck it under the left end.
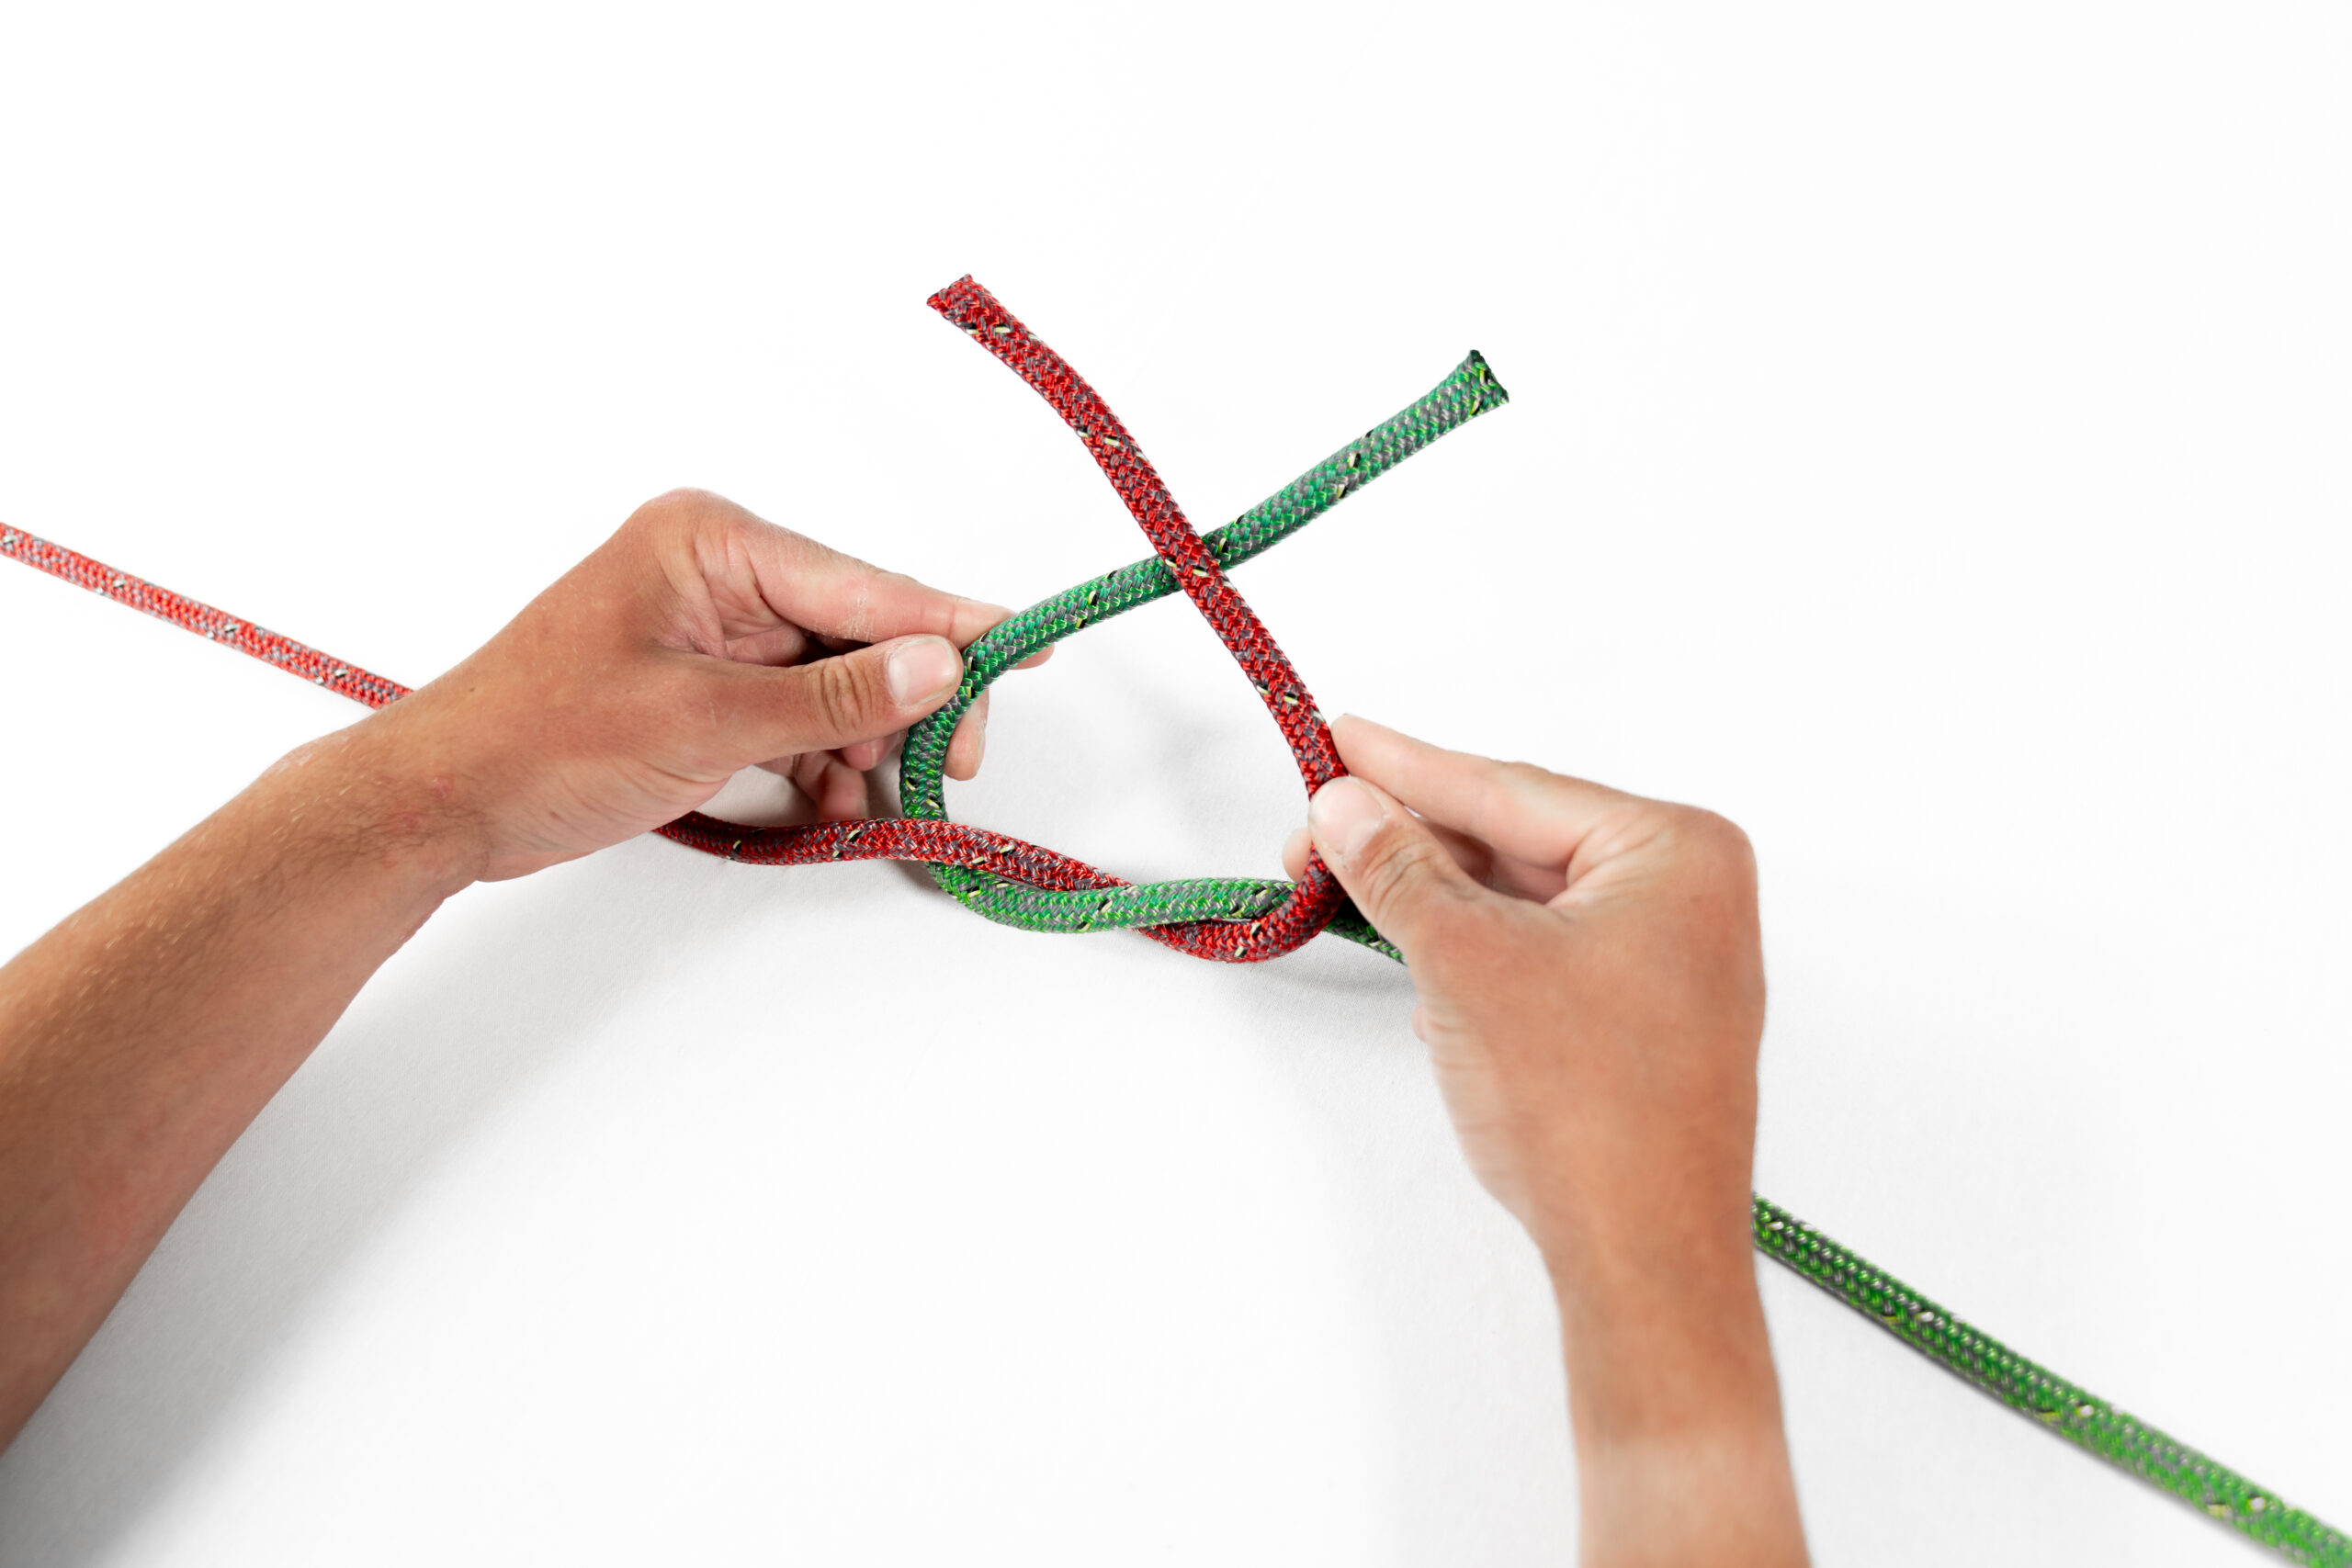
right over left
Pass the right end over the left and pass it through the middle
Complete the Knot
Pull both ends to tighten the knot. The reef knot is completed when the two ends are snugly secured together.
Check the Knot
Ensure that the knot is flat and symmetrical. The ends should emerge parallel to the standing parts of the rope.
It’s essential to note that when tying a reef knot, the same end that starts on top should finish on top. This ensures the knot holds properly.
Undo:
Pull either loop within the knot to undo it.
Take care not to create a granny knot where the tails sit perpendicular and will tighten and tighten making it difficult to undo.
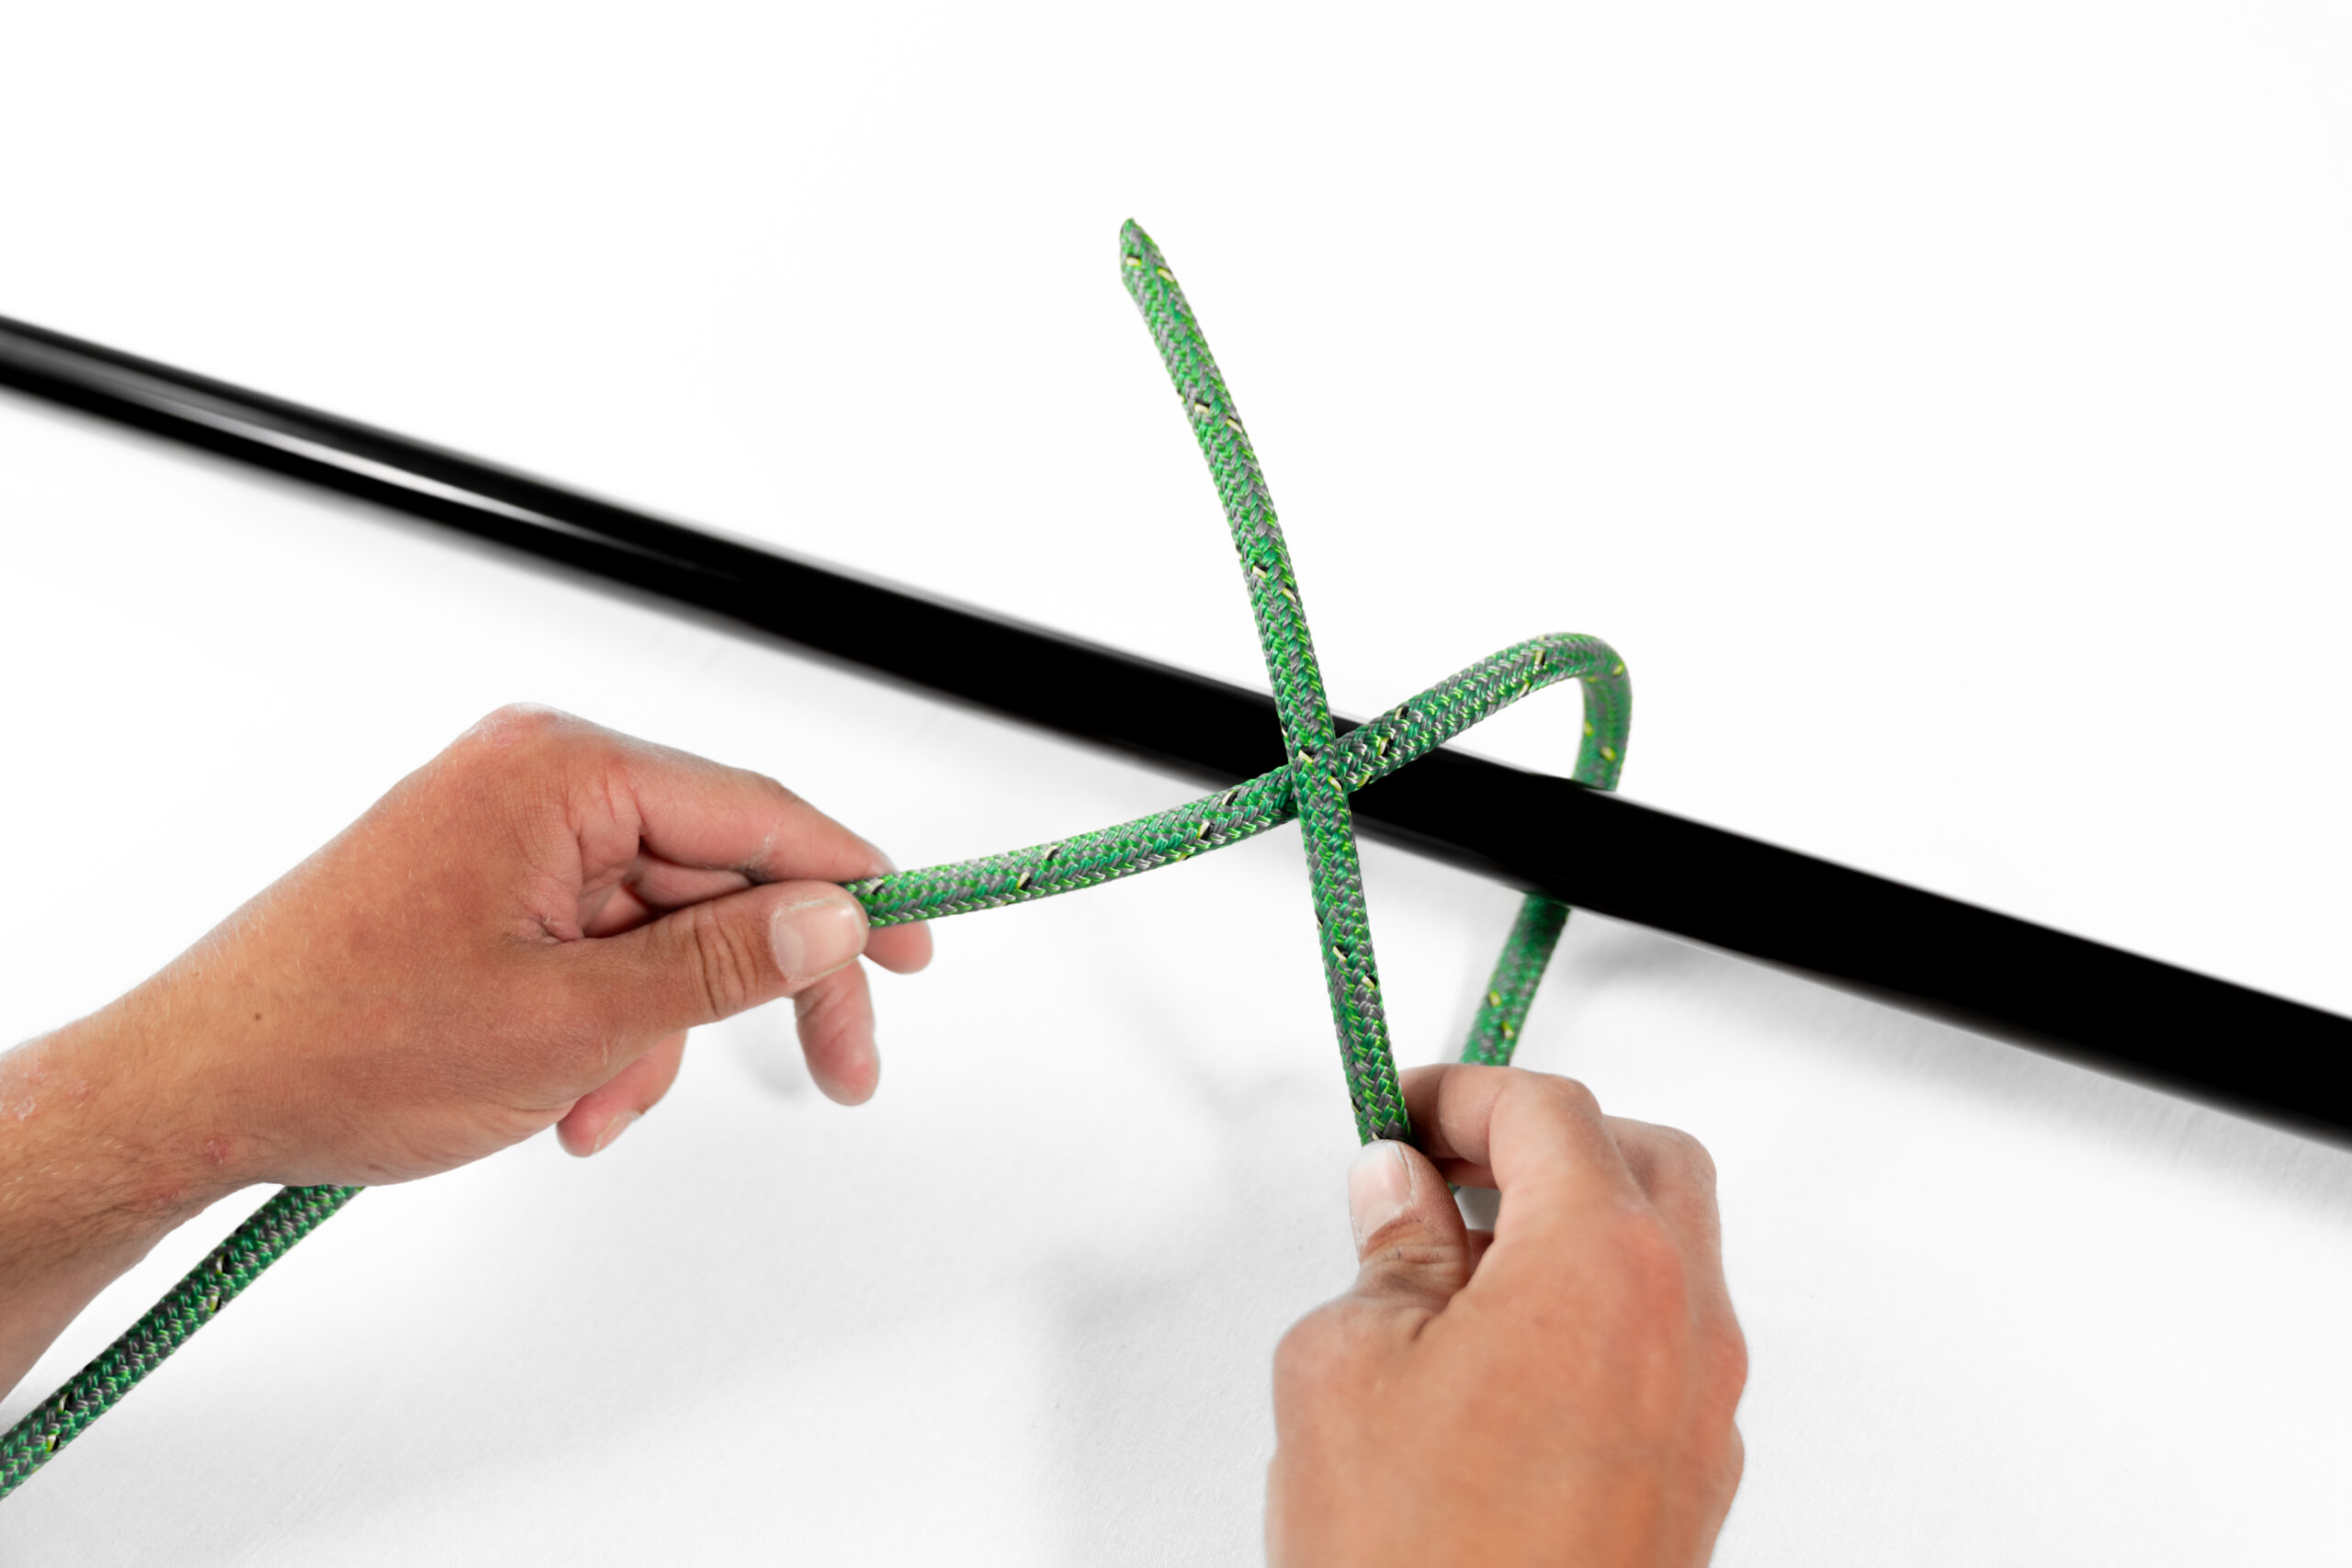
Clove hitch
A clove hitch is a versatile knot often used for temporarily securing a rope to a pole or wire. Used onto tie fenders, it’s quick to tie and untie, making it useful in various situations. The clove hitch is easily adjustable, but it’s important to note that it may slip under heavy loads or if the standing part is pulled in the wrong direction. A clove hitch with a half hitch is often used to ensure no slipping.
Clove hitches are still used for flying flags such as:
- A square yellow flag when you arrive at a different country to alert Customs you are from abroad.
- A small version of a foreign country’s ensign as a courtesy when flying your country’s ensign
- Or club burgees that are flown mostly at the top of the mast; in this case the flag will be on a stick which will need two clove hitches to allow the flag fly above the electronic equipment. As long there is constant pressure on both parts (IE up and down). The clove hitches will do their job.
Here’s a step-by-step guide on how to tie a clove hitch:
Wrap the Rope
Position the working end of the rope near the wire where you want to tie the clove hitch.
Wrap the working end around the wire, crossing the working end over the standing part of the rope, creating an X shape.
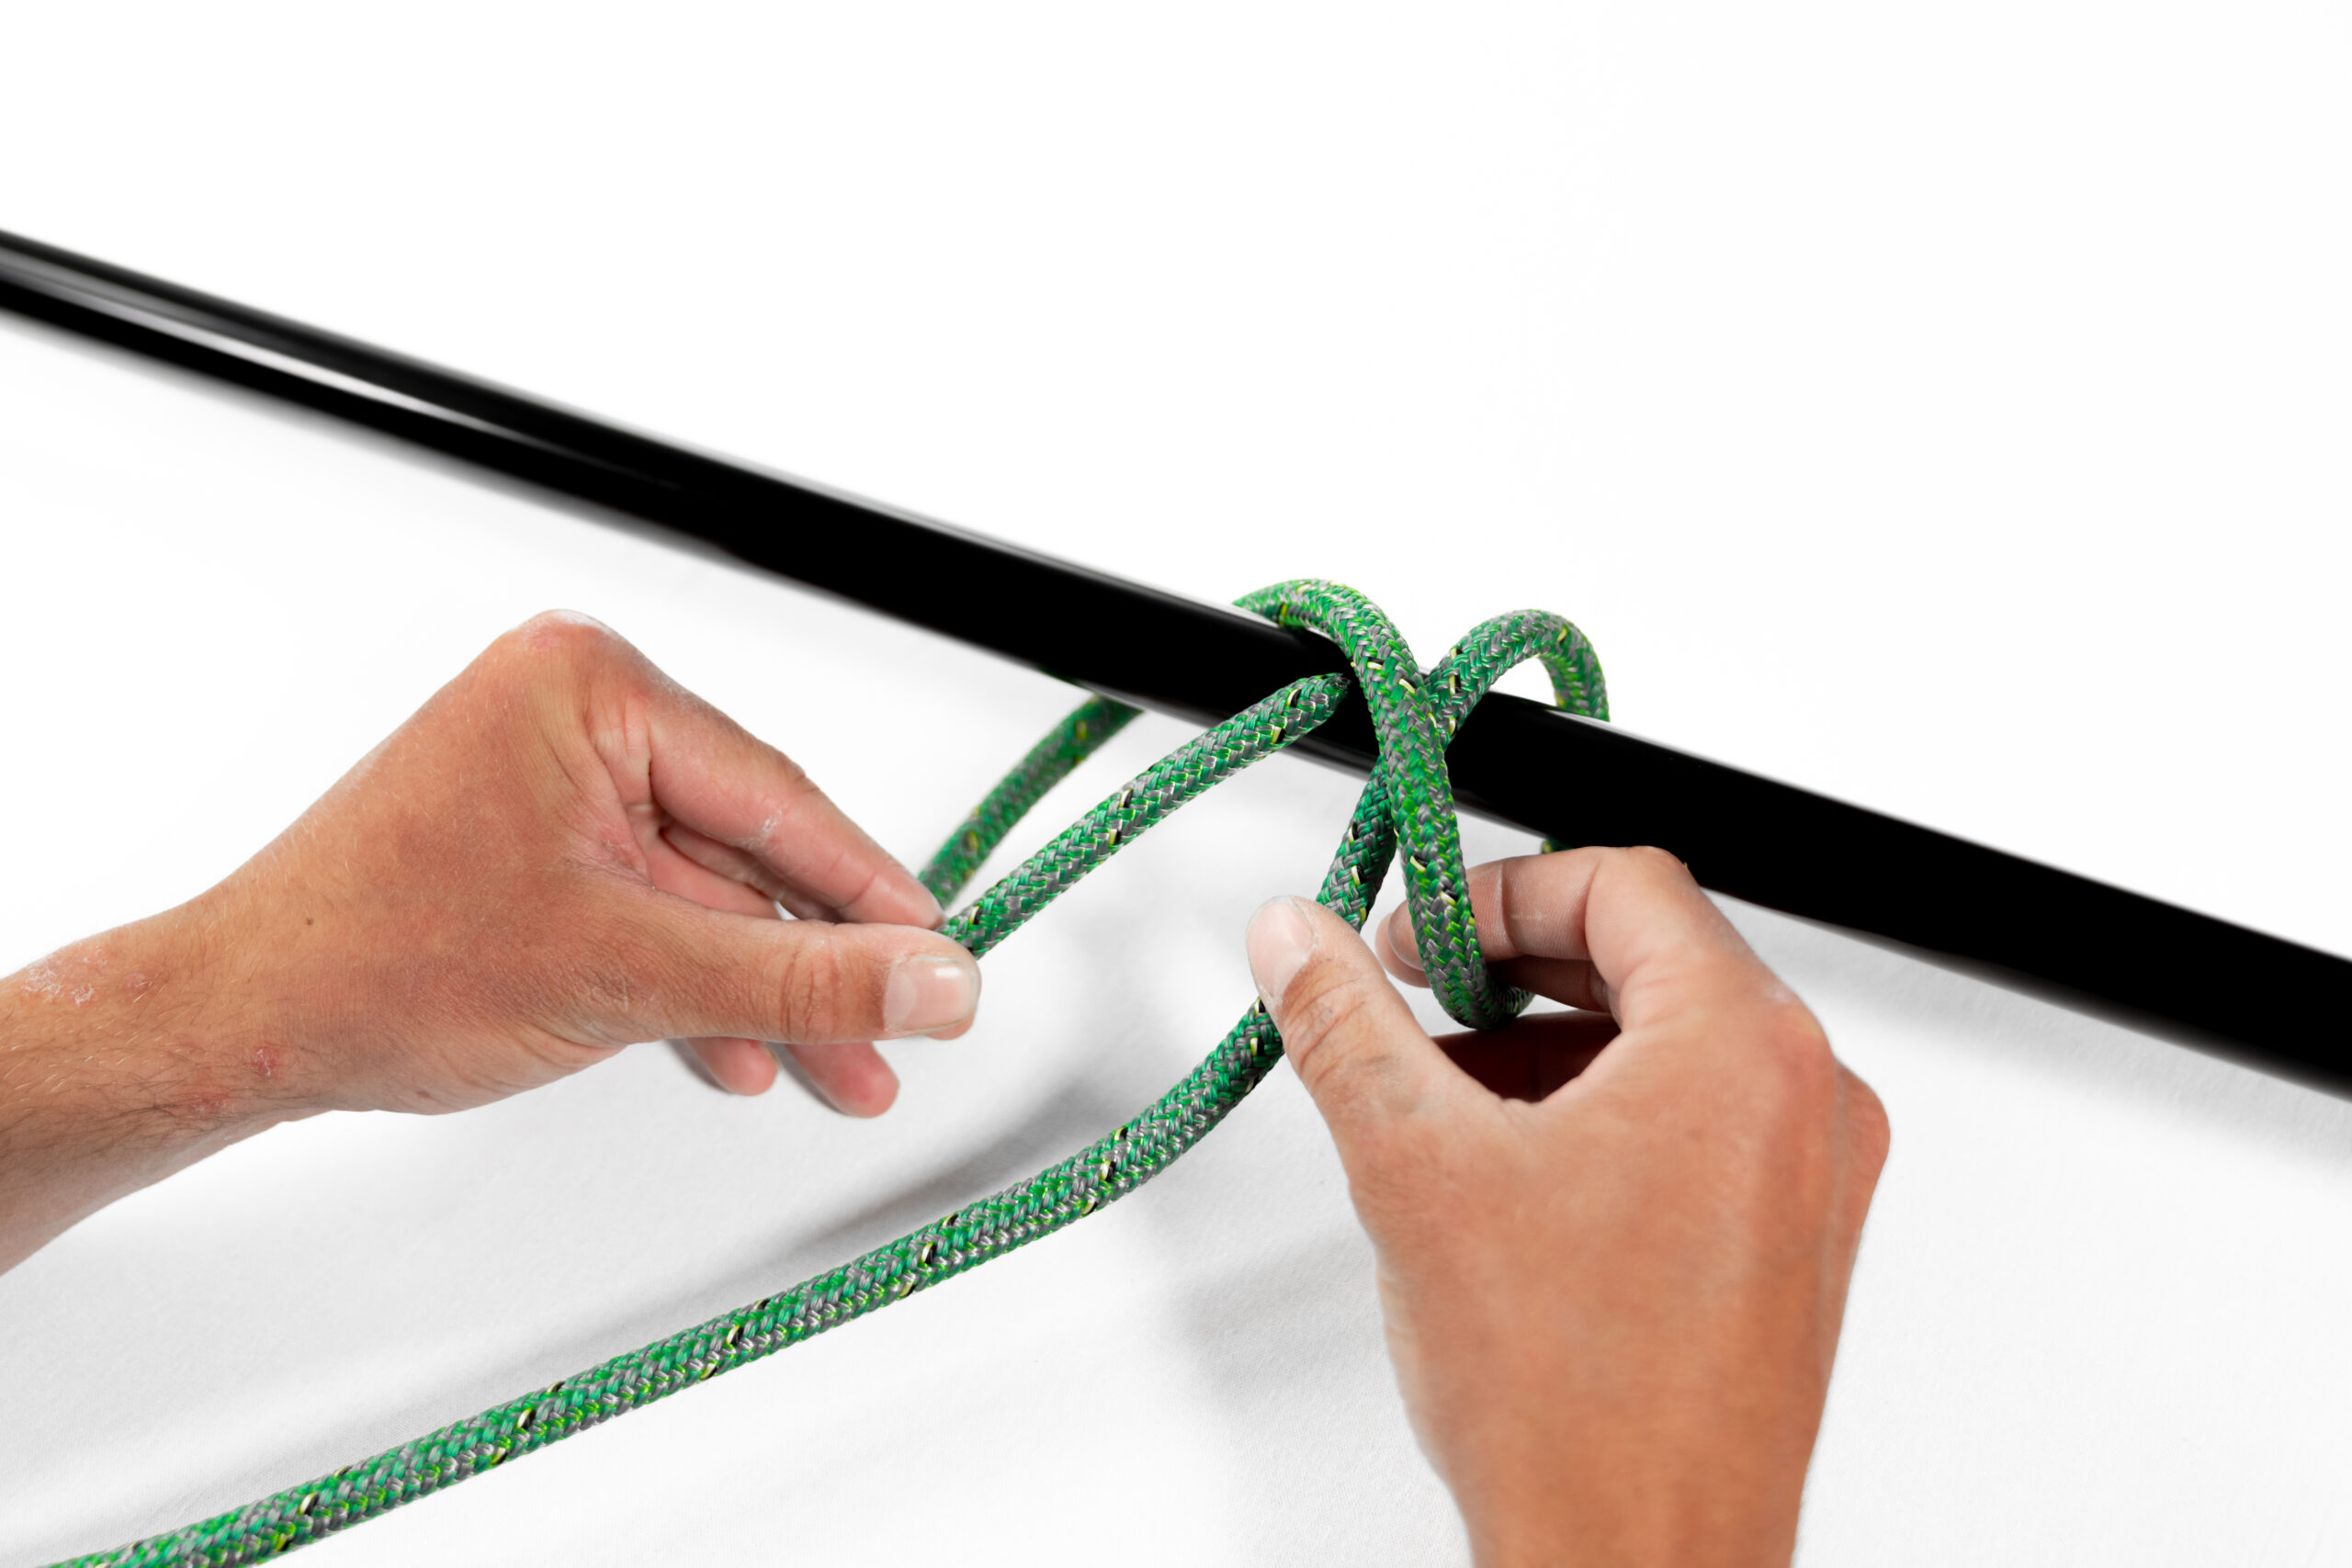
Wrap Around Again
Wrap the working end around the wire once more, passing on the opposite side of the initial wrap.
Tuck the working end under the X created by the wraps. This completes the clove hitch.
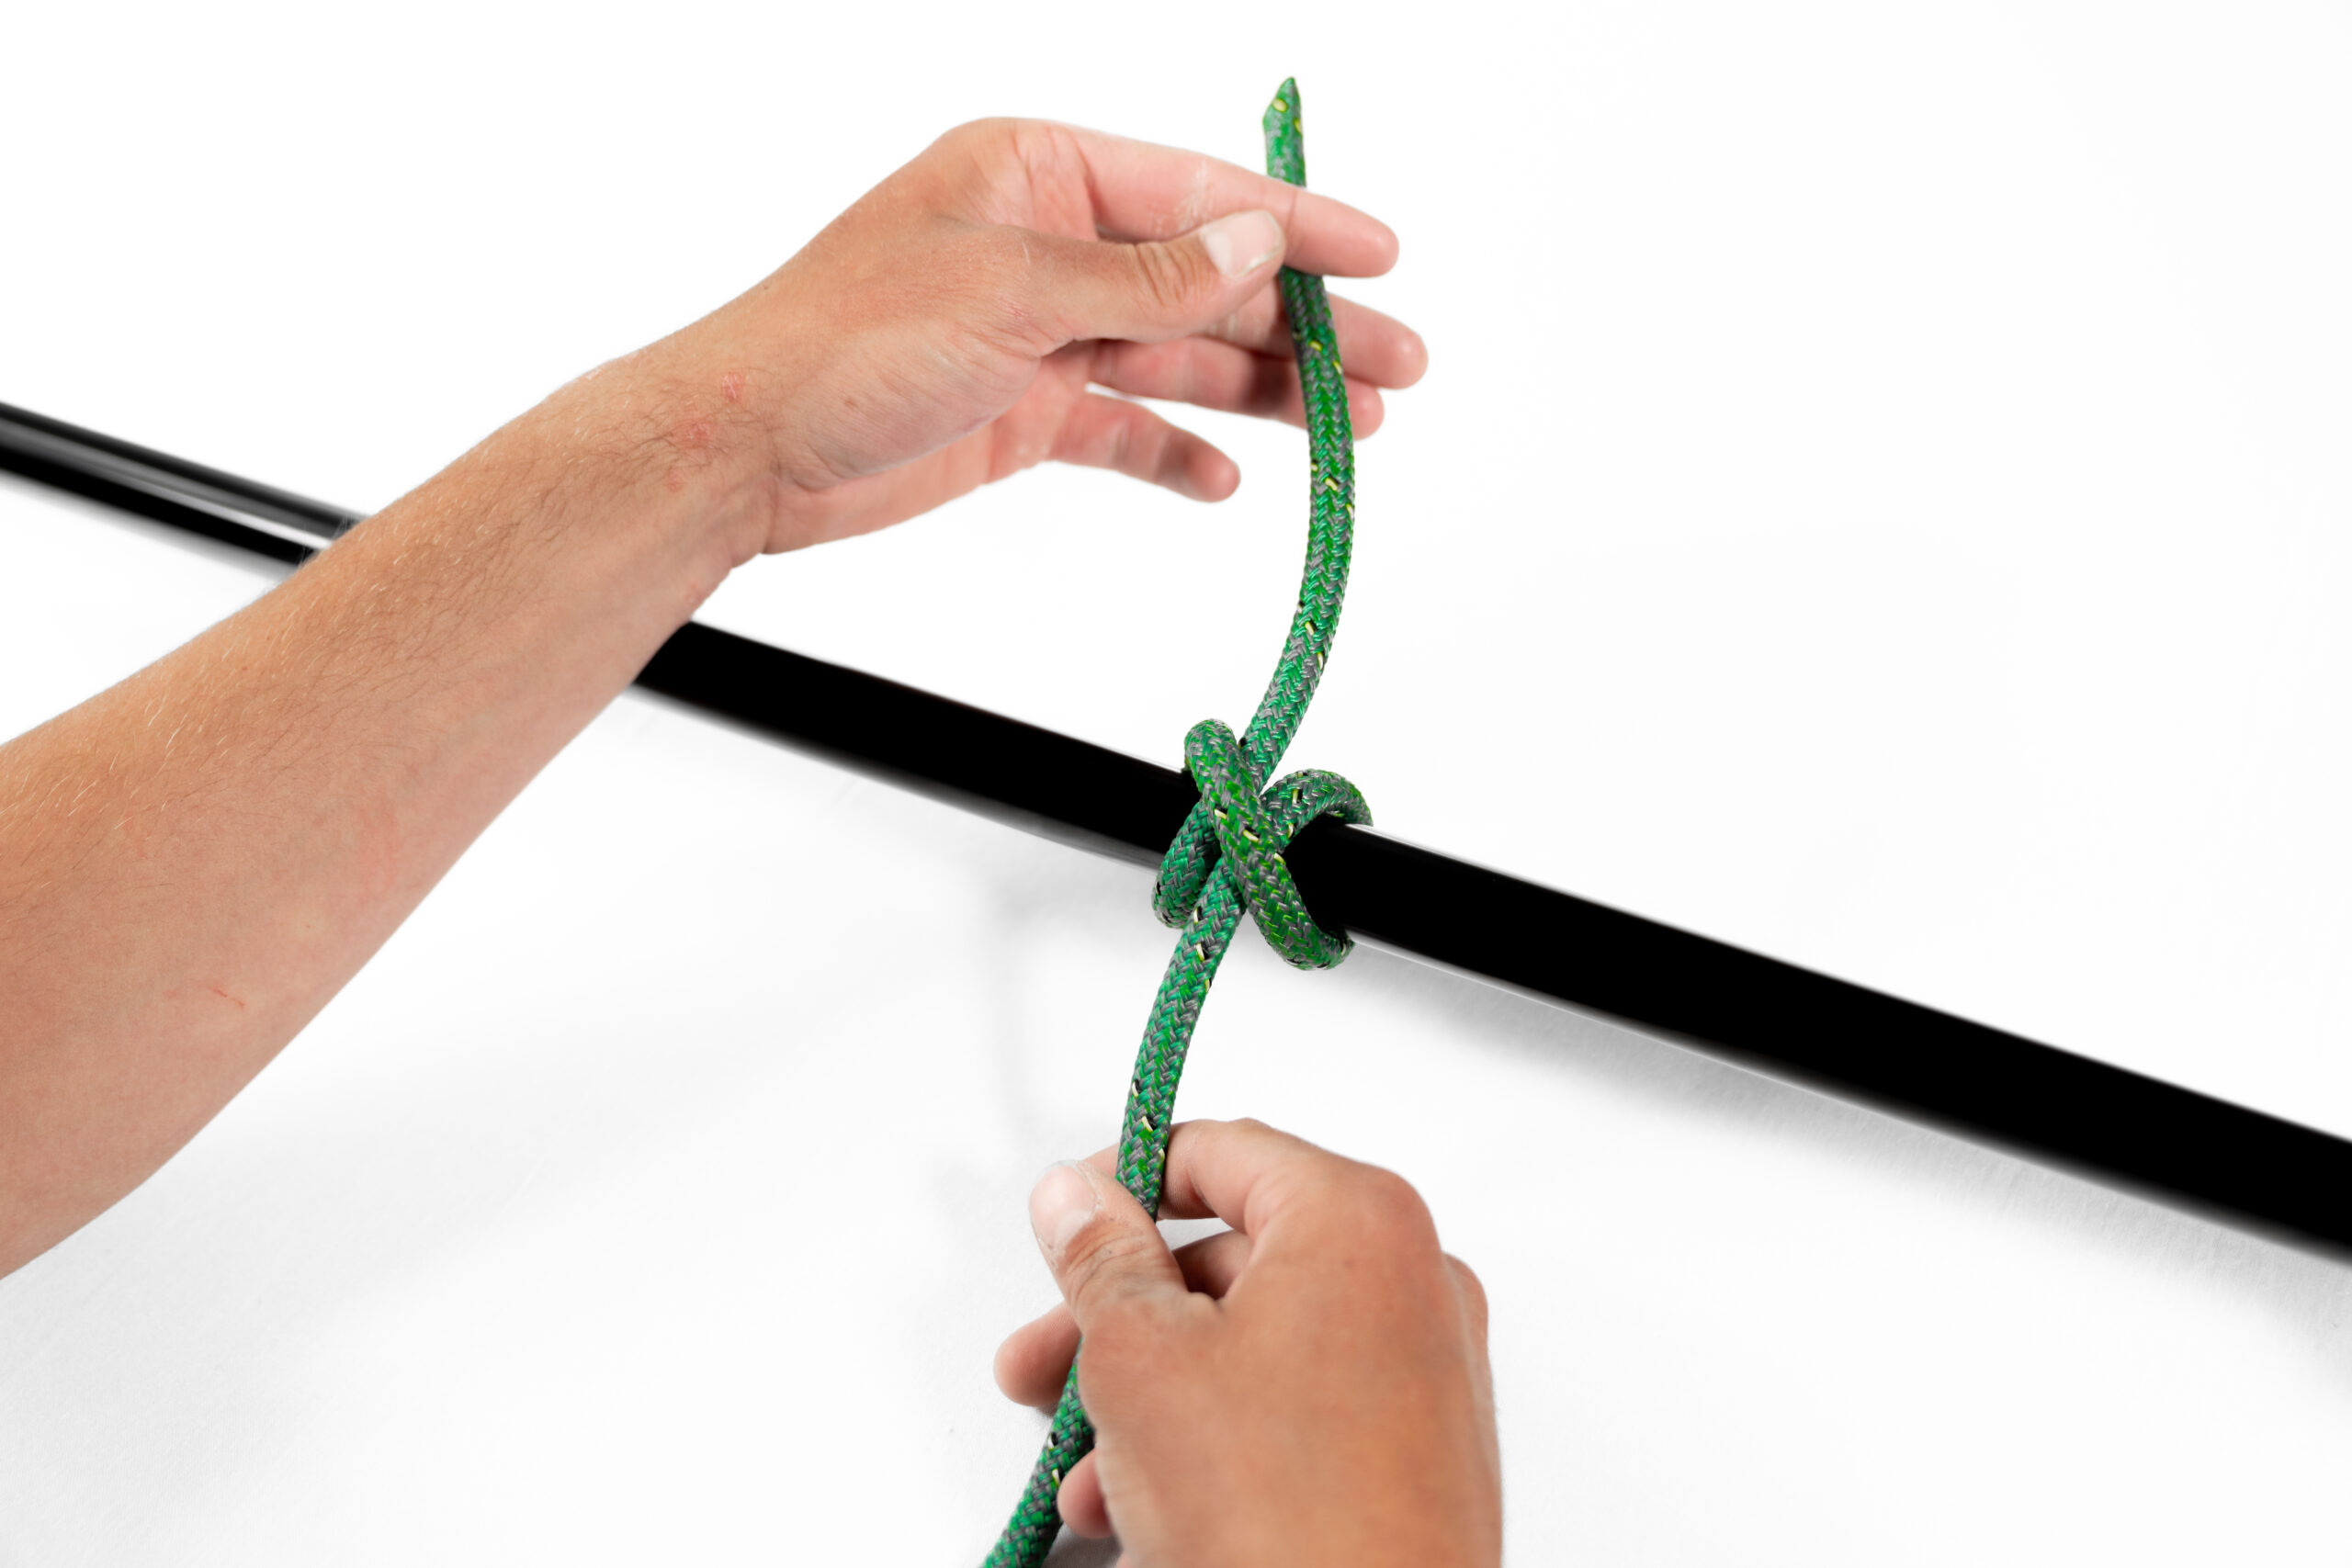
Adjust and Tighten
Ensure the wraps are snug against the wire, and the hitch is secure. You can adjust the tightness by pulling on the standing part and working end.
Undo:
Very easy when the tension is removed.


